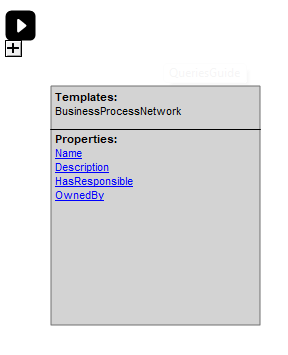
When we want to create our first composite query, we should open the previous Query, and press the plus sign under the play button as seen here:
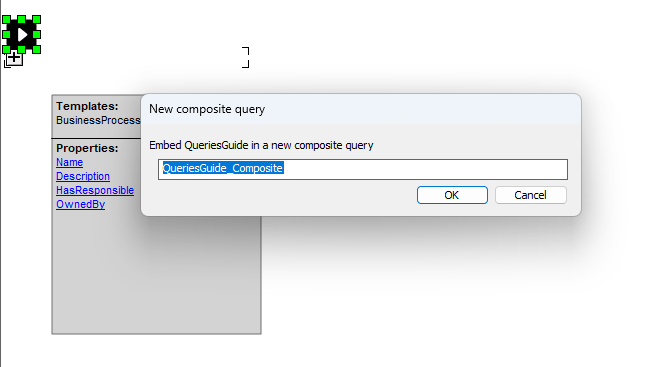
After you press the plus sign, you’ll be prompted to name your composite query – by default, it will take the name of the underlying query and automatically append the suffix “_Composite”:
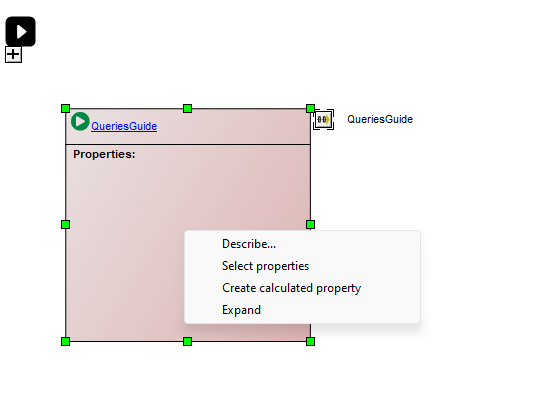
After clicking OK, you’ll be presented with your new composite query. This is designed a bit differently, so it’s easy to differentiate, but the core functionality is identical. As before we can double-click inside the salmon colored square and get a few options. Some are familiar, and one is new.
Tip: Note the little icon to the right of the square. This is a link to the underlying query, and you can navigate directly to it by pressing the arrow.
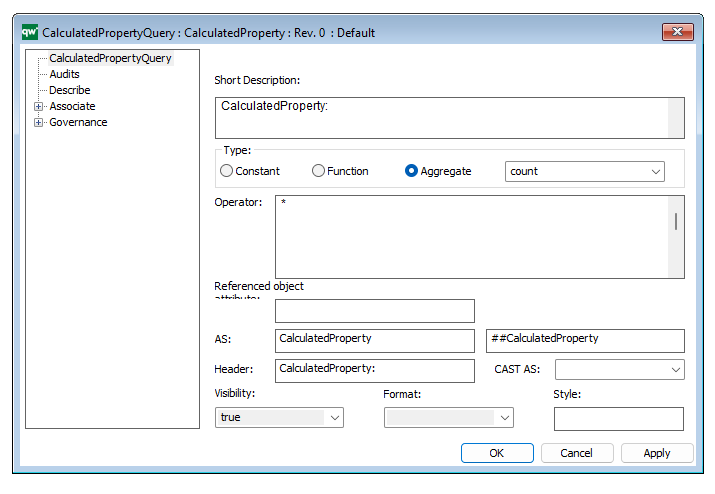
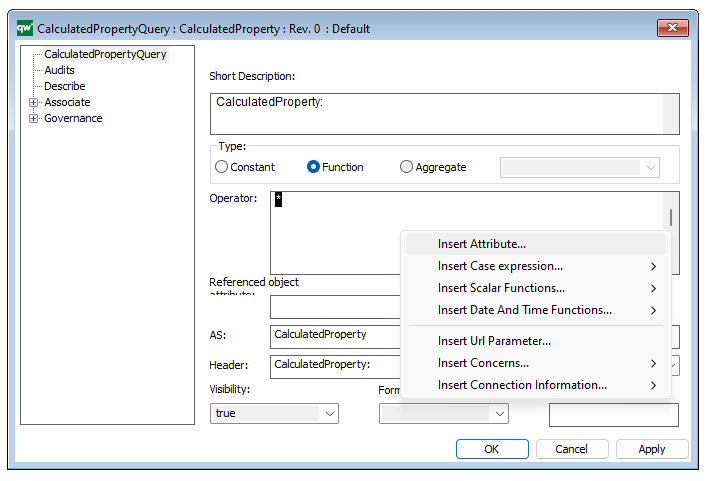
After pressing OK, we will be presented with a CalculatedPropertyQuery Window:
Now we have three types to choose from Constant, Function and Aggregate. Let’s go over these:
1. Constant:
A constant calculated property is a property that has a fixed value and does not change based on any conditions or calculations. It is typically used to store static information that remains the same for all instances of an object. For example, you can create a constant calculated property called “Status” and set its value as “Active” for all objects.
2. Function:
A function calculated property is a property that is calculated based on a specific function or formula. It allows you to perform calculations or transformations on other properties or values and store the result in the calculated property.
For example, you can create a function calculated property called “Total Cost” and define a formula that multiplies the values of the “Quantity” and “Unit Price” properties.
Functions in calculated properties can use various mathematical, logical, and string operations to perform calculations. They can also reference other properties, constants, or even call built-in functions.
3. Aggregate:
An aggregate calculated property is a property that aggregates values from a set of related objects. It allows you to perform calculations on a collection of objects and store the aggregated result in the calculated property. Aggregates are typically used to calculate summary information or statistics from a group of objects.
For example, you can create an aggregate calculated property called “Total Sales” for a group of sales transactions. This property can calculate the sum of the “Sales Amount” property for all related transactions.
Aggregates can use various aggregate functions like sum, average, count, min, max, etc., to perform calculations on the related objects. These can be changed using the dropdown menu next to the aggregate checkmark or entered manually into the text field.
In addition to the base types, we have implemented various functions to assist you in navigating the diverse possibilities within Calculated Properties. Proficiency in utilizing these functionalities is cultivated through a process of trial and error. Experience plays a pivotal role, making practical learning the most effective means of mastery.
We will refrain from providing a detailed walkthrough of the implemented functions, as the information is readily accessible through online resources. Instead, our focus will be on offering insights into specific use cases.
To illustrate, let’s begin with a straightforward example demonstrating how we can validate the data from our composite query:
The above example is relevant to our dataset, as the attribute T01.T01HasResponsible correlates with the current table, and the attribute named T01HasResponsible. By referring back to the previously interaction with property values, we can use the provided information in attribute column to verify that the attribute name is indeed correct.
The language is comprehensible to humans; however, we employ the operator !=, known as a negative validation, which can cause confusion. We verify the presence of the HasResponsible attribute by confirming that it is not empty. If the attribute is not empty, the result is affirmative (Yes); otherwise, it is negative (No).
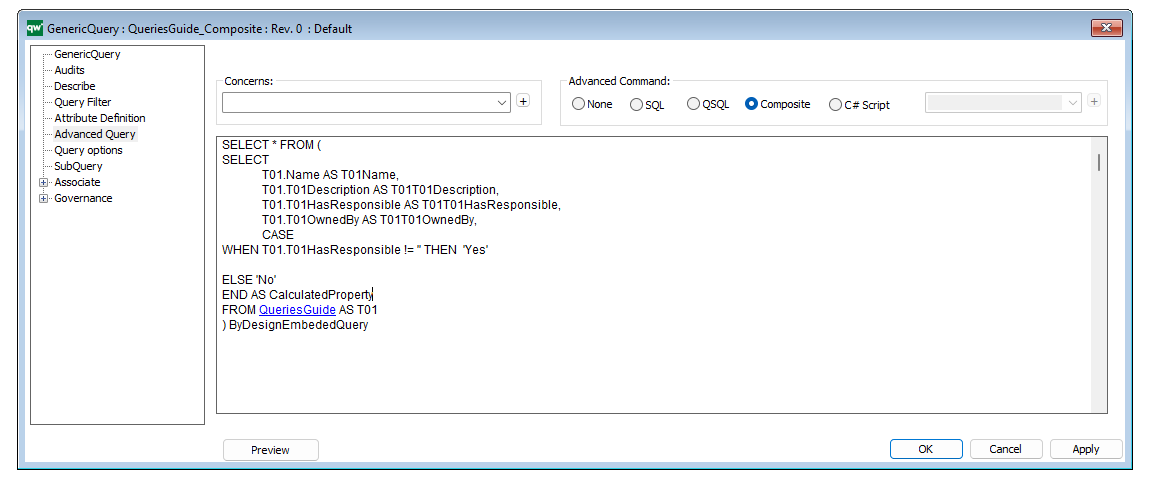
Let’s go back and build our Composite Query by double clicking on the play button in the salmon colored QueryDesign. As soon as the server have executed the query, it will return the dataset to you and present you with a new GenericQuery with everything compiled together including our Calculated Property:
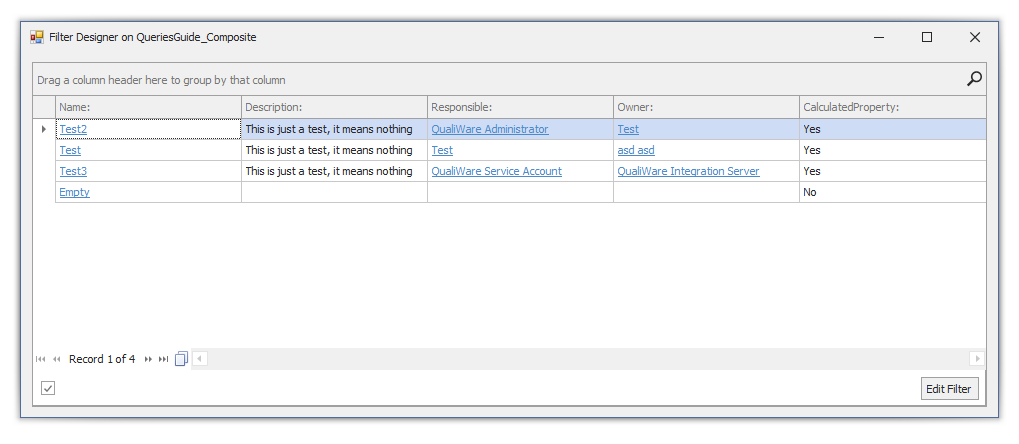
Let’s press the preview button and look at the results:
Now we see our Calculated Property in action, and we can see that it’s verifying our data as expected. This specific use-case is not the most useful from an organizational perspective, but it shows how we can translate data into simple calculations and give a nice overview.
Notice the Header is still called “CalculatedProperty”. As we have used the generic naming scheme, it will cause confusion in the presentation and how it correlates back to the CalculatedProperty.
If we would like to change the header only, we are able to do this in the Properties Settings.
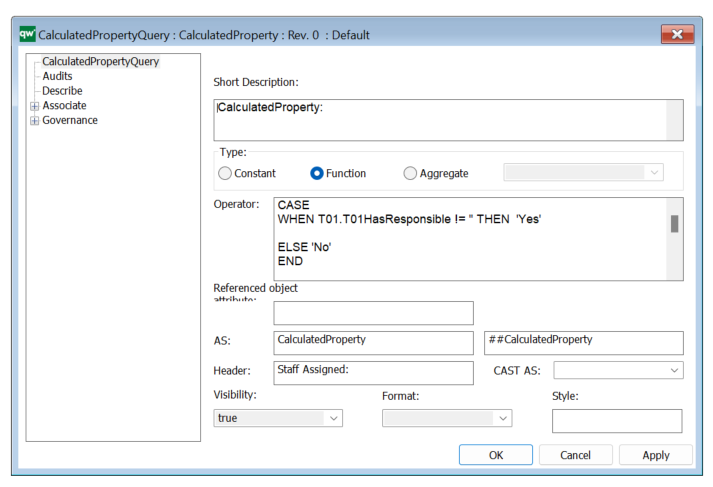
Go back to the querydesigner and click on the blue properties link, that is associated with our CalculatedProperty. Immediately, we are presented with the CalculatedPropertyQuery prompt as seen in the image below.
We have a selection of names that all correlate back to the original name for our property, such as the description, the AS value and the Header itself. As mentioned, a telling naming structure provides a lot of clarification in how various elements are used in the future. To update this column while retaining the ineffective naming scheme, we need to assign it a different header. Simply change the header field to something more meaningful, like ‘Staff Assigned:’.
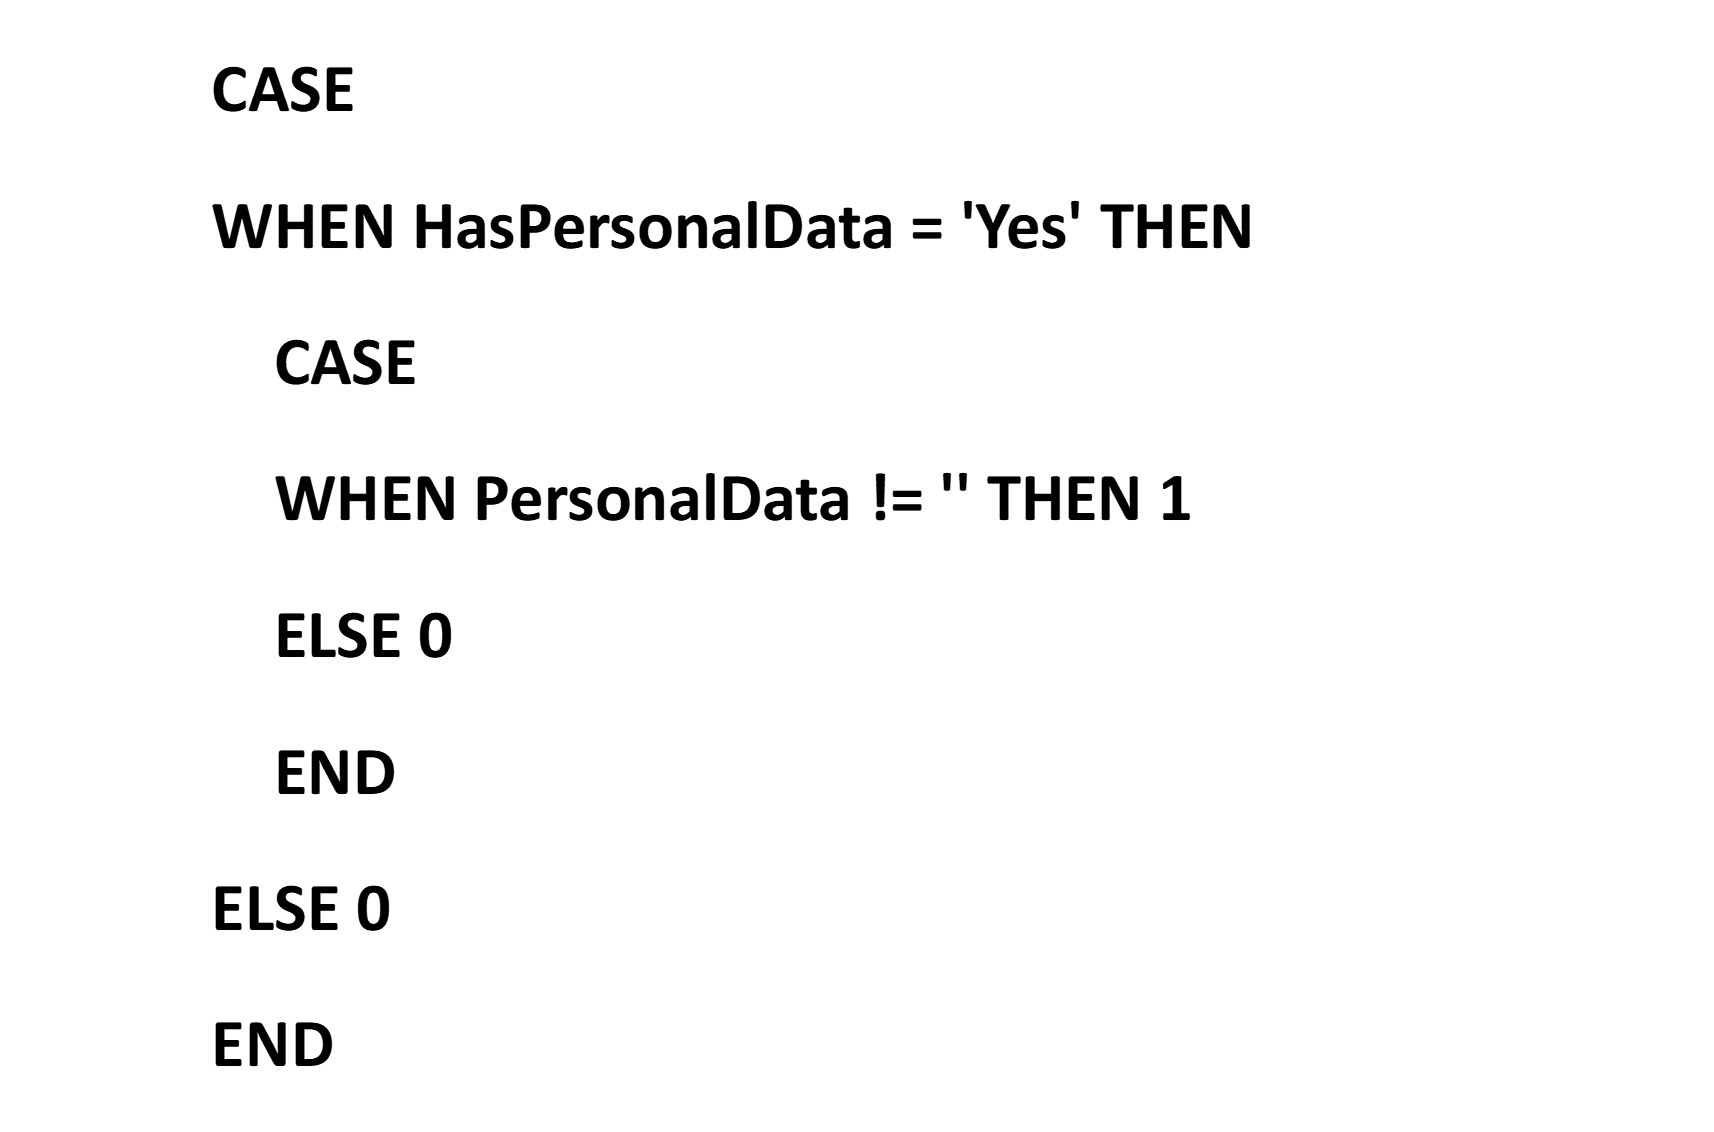
To end this chapter, we can look at a more complicated example:
In the above function, we wrap a Case Expression with a Case Expression. What we achieve in this scenario is verification of two attributes. First, we check if the ‘HasPersonalData’ attribute equals to ‘Yes’. If it does, we have another Case Expression checking to see if the ‘PersonalData’ attribute is filled out. Once again, we use negative validation to check if there are any characters in the attribute – if there are, we return to the number 1. The above calculation can be stacked with a ‘+’ sign between them, allowing it to be used to verify, for example, relevant GDPR entries and ensure that all our compliance procedures are complete.
