It is a typical phenomenon that only a select few experts are doing the modelling in your organization, which in turn results in a lack of understanding and use of the models in the rest of the organization.
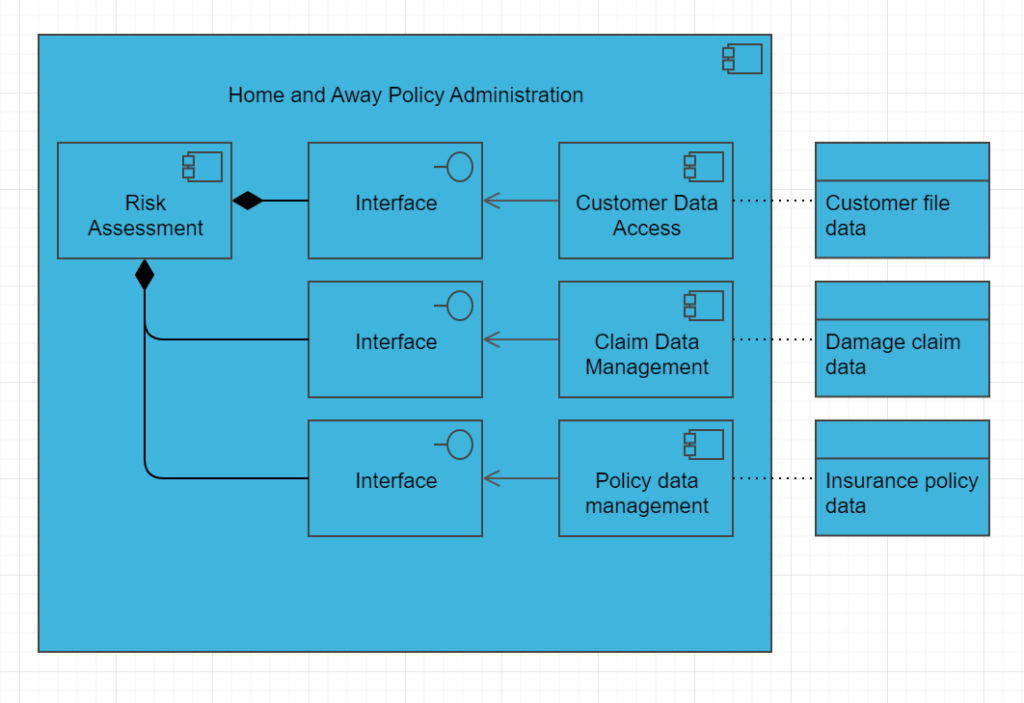
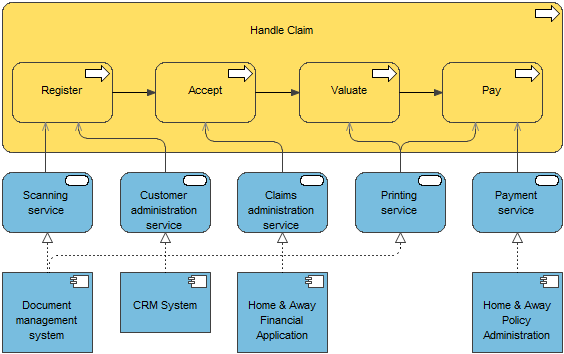
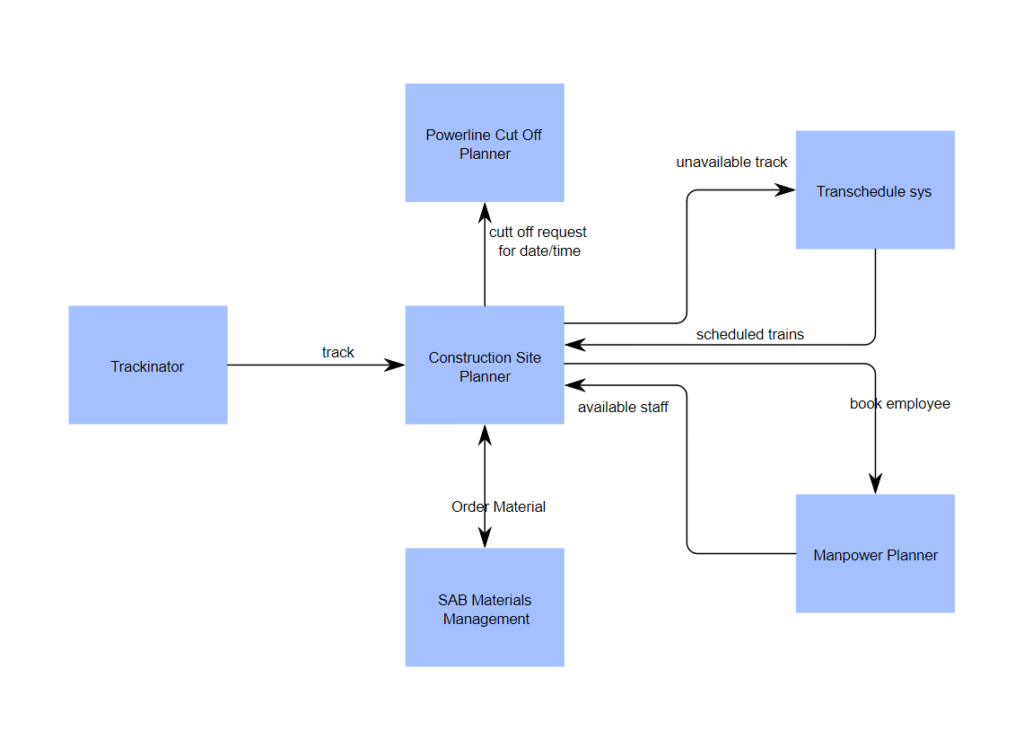
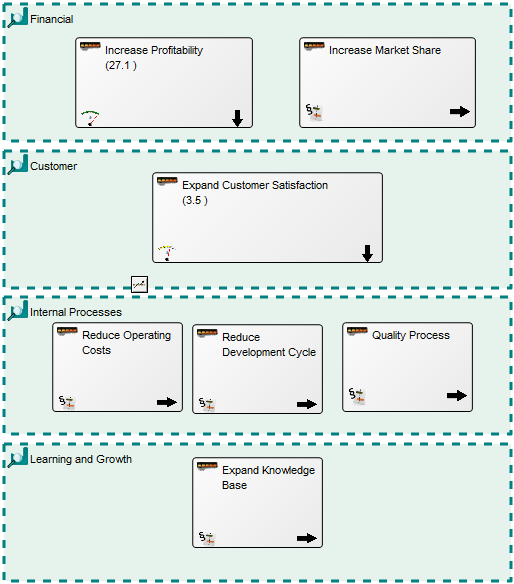
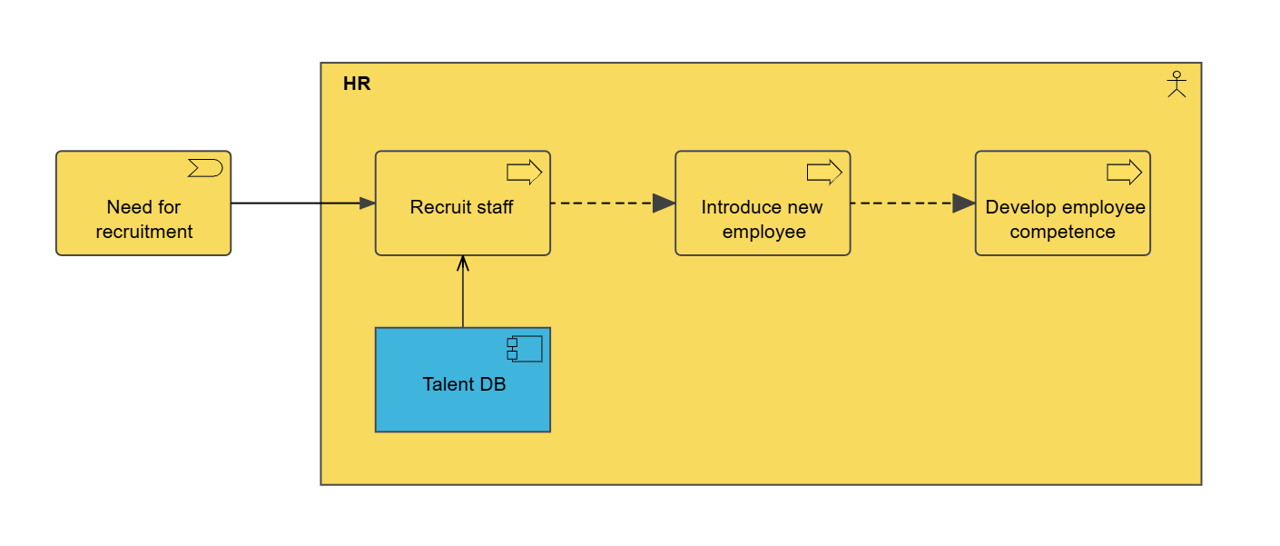
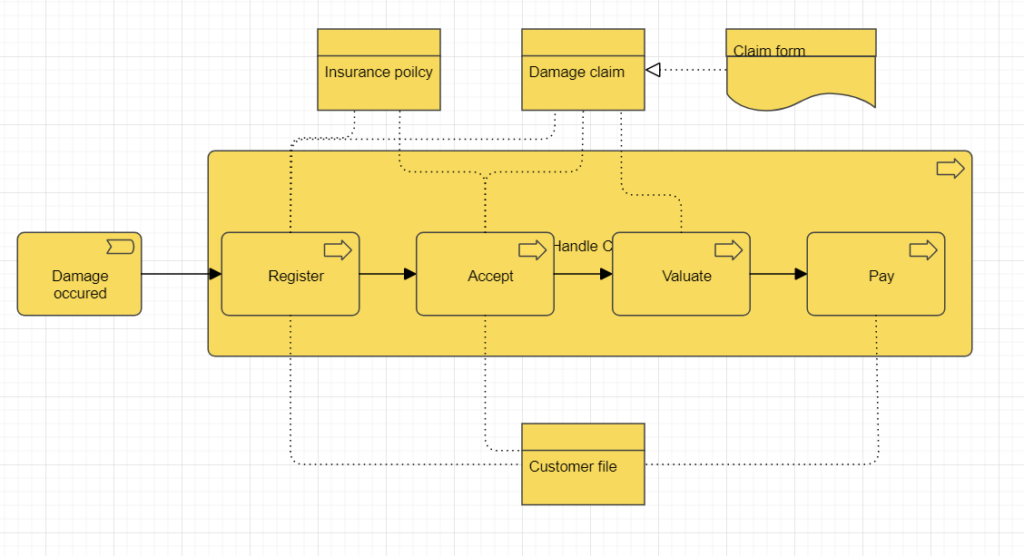
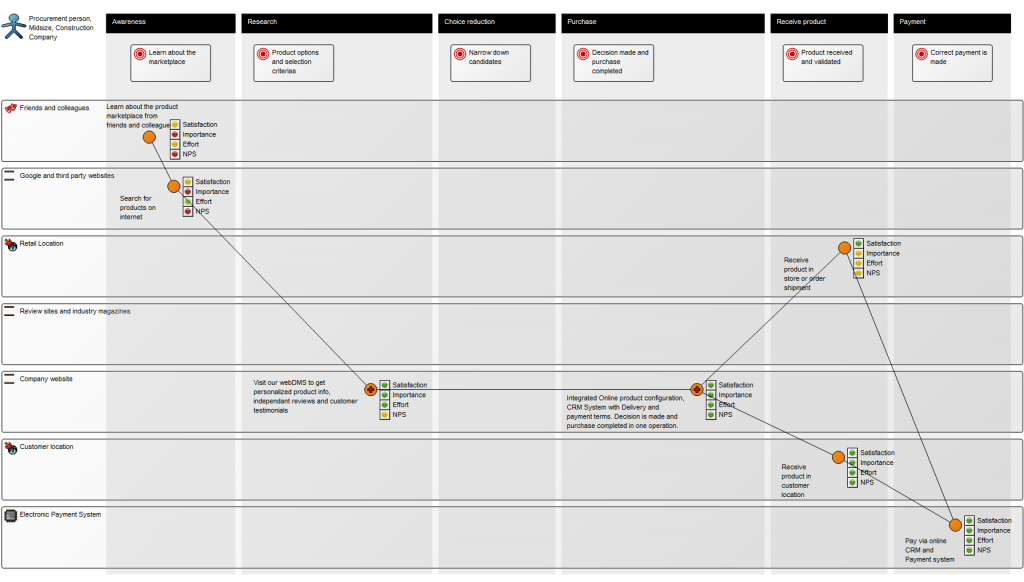
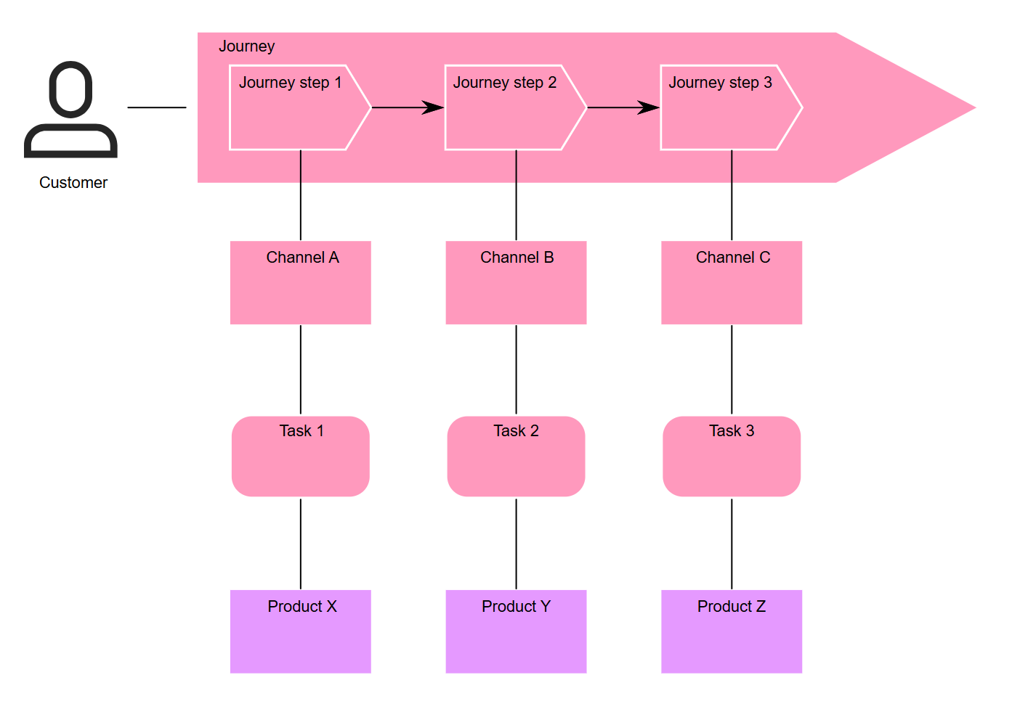
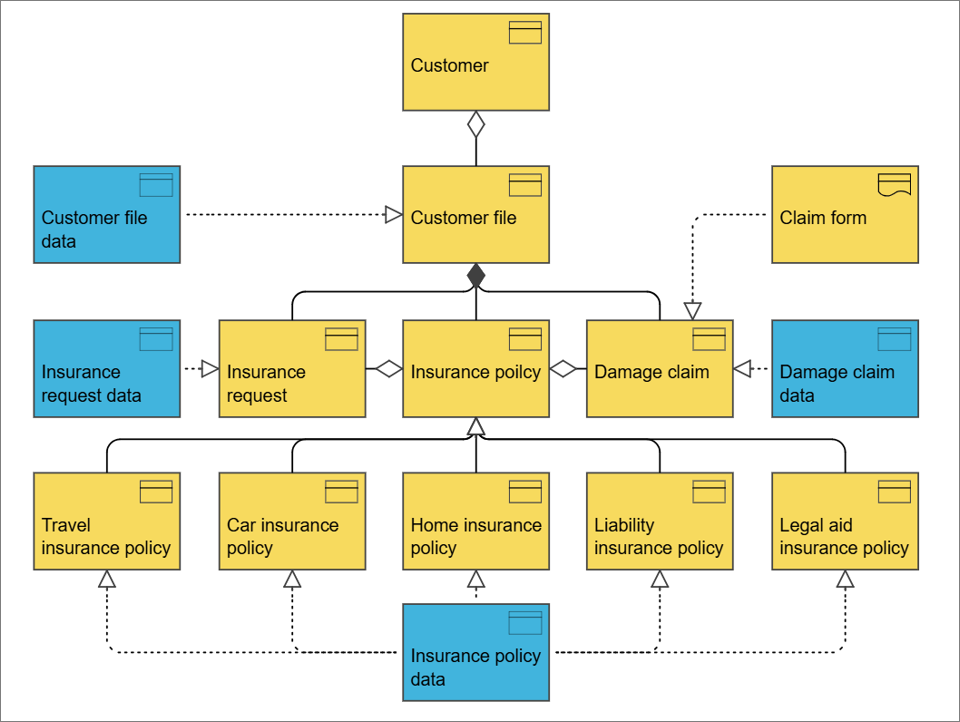
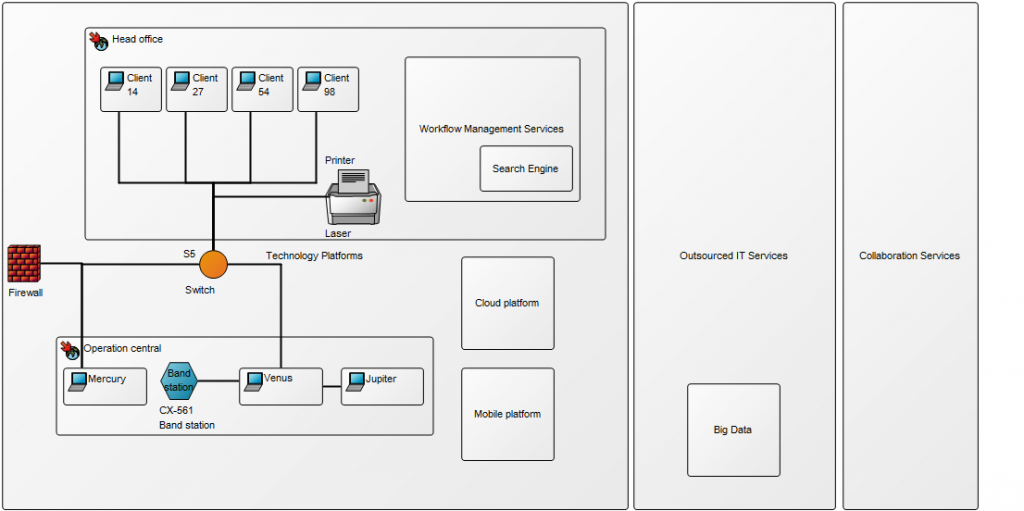
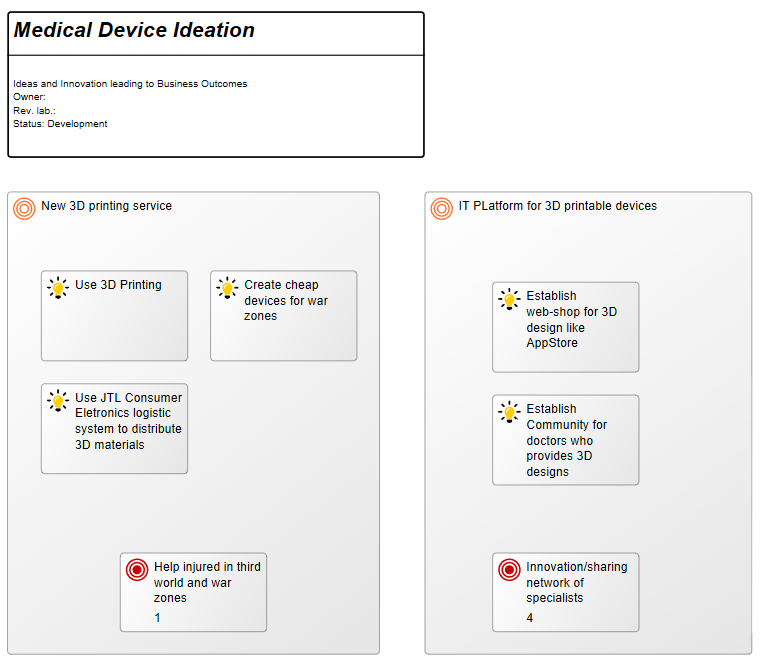
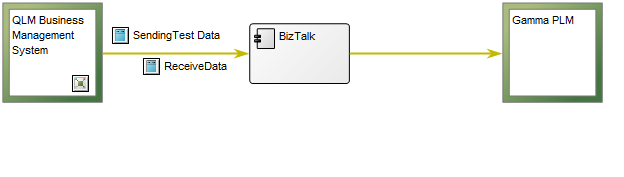
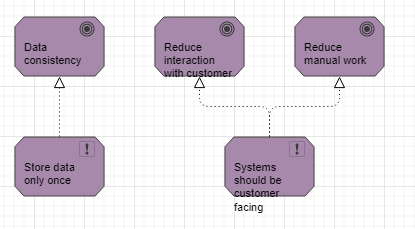
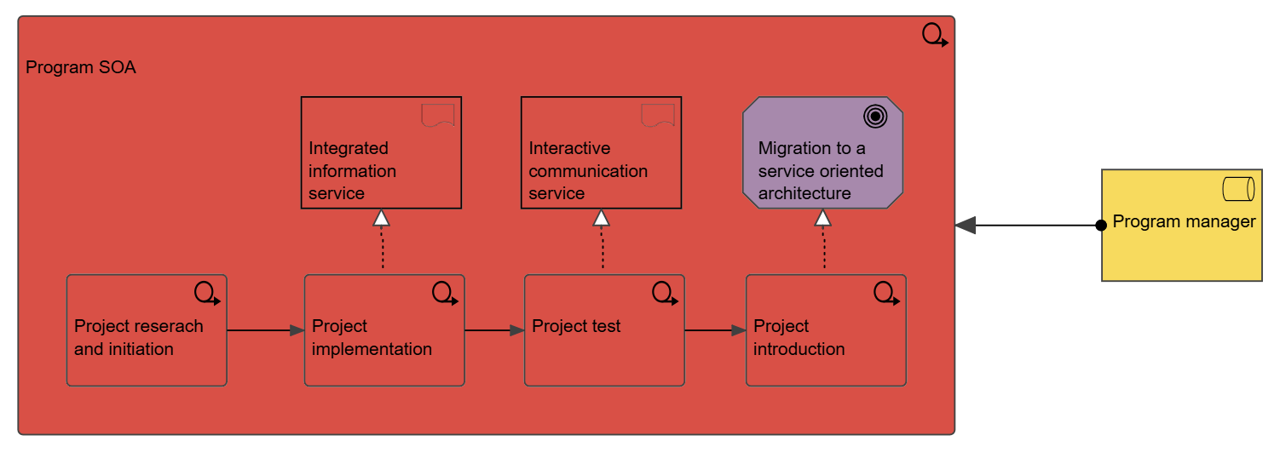
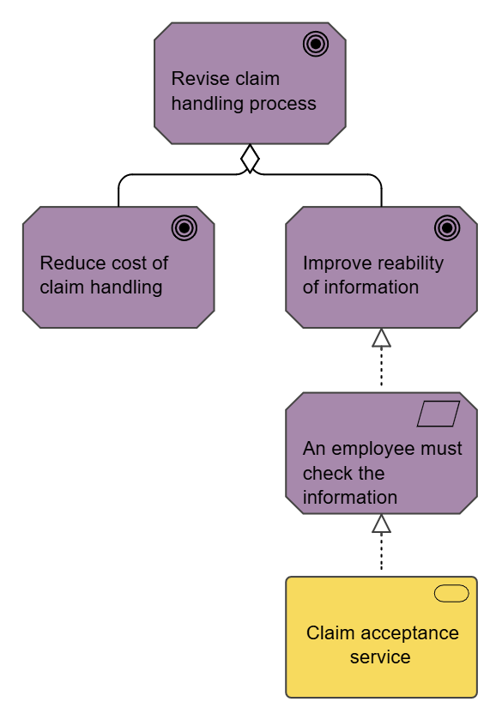
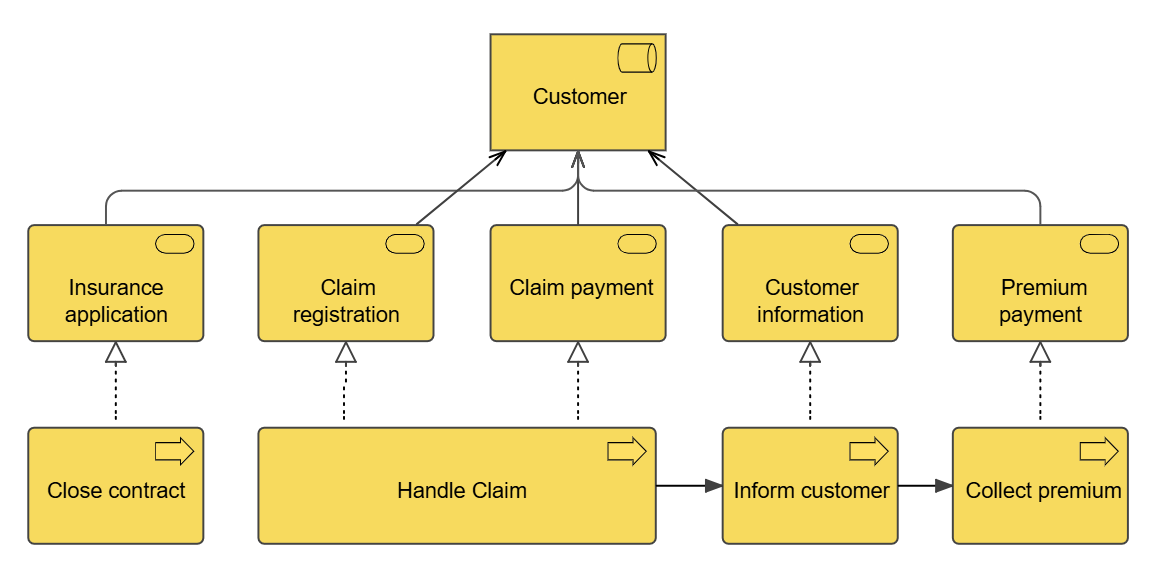
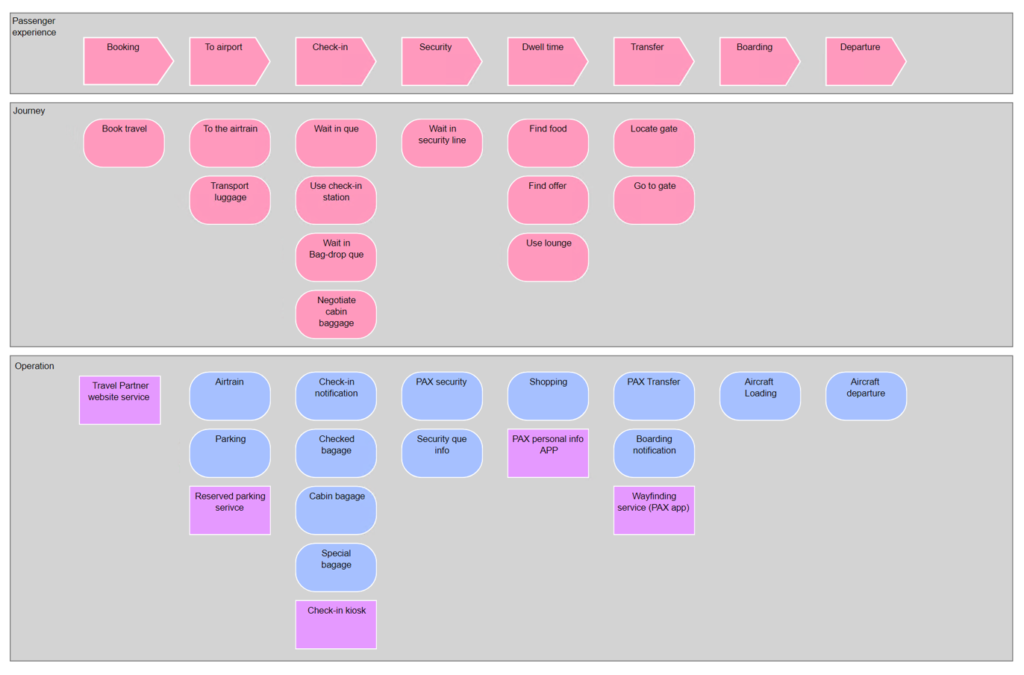
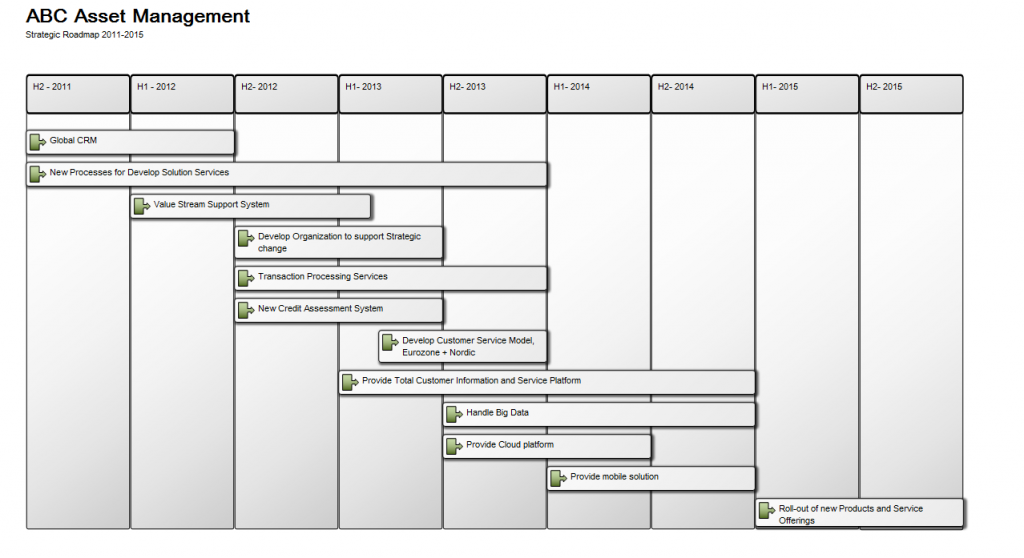
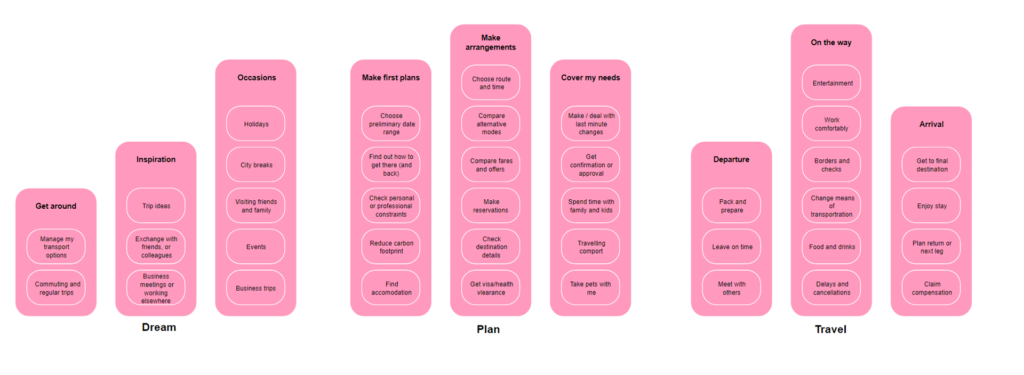
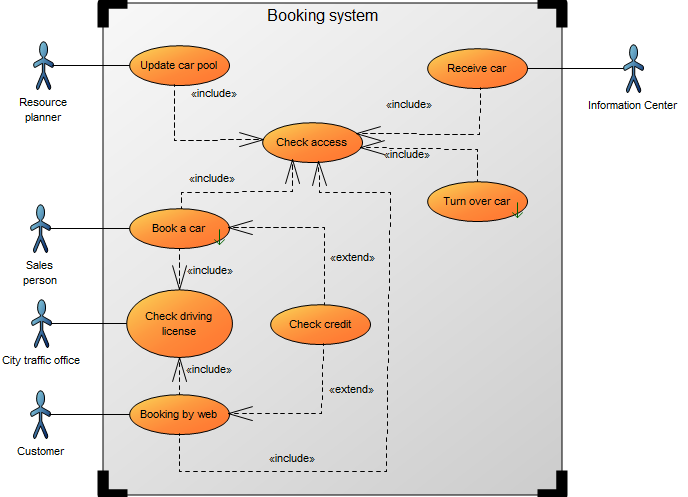
With QualiWare X we are creating a space for inclusive collaboration in a web-based interface, with the purpose of organization-wide involvement. By enabling everyone to create business process networks, workflow diagrams, ArchiMate diagrams, EDGY maps and variuos other types of diagrams, directly from your browser, with intuitive and easy-to-use visual drag and drop design, you are guaranteed increased mobility, flexibility and stakeholder engagement across the entire organization.

Symmary
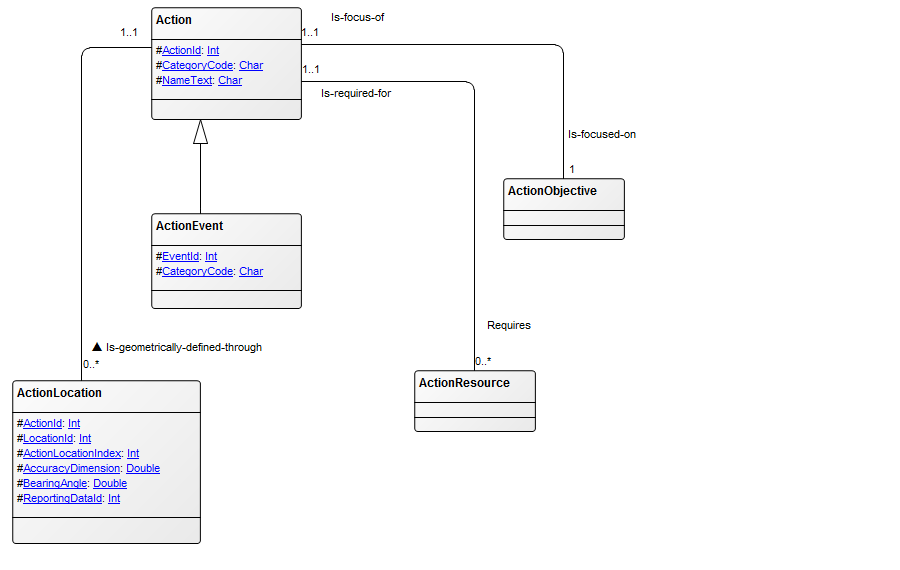
The Web-modeler enables you to easily create diagrams in accordance with the underlying meta-model.
The diagrams can be created and edited the “classic way”, using the drag-and-drop design:
- adding symbols
- reusing symbols
- connecting symbols
- editing symbol properties and characteristics (in the Property Window)
In the Editing Toolbar you can find buttons that can rearrange, resize and align symbols.
Use the Layout panel, to automatically organize the objects in accordance with one of the available standard layouts.
You can also use the import menu to accelerate the model creation based upon inserted/imported text:
- by using the text-to-model feature,
- or use the new table-to-model feature introduced in QualiWare 10.8
From QualiWare 10.9:
- You can use QualiAI to AI-generate diagram and content
- QualiHelp can give relevant assistance to the tool and the diagram type, when working in the web-modeler.
- You can open multiple diagrams in the web-modeler in the same time.
- Easily paste pictures on symbols to make your models more personalized
- It is possible to make a graphical comparison of different revisions of a diagram in the web-modeler.
In QualiWare 10.10 the User Interface has been updated in Web-Modeler, and additional features have been included.
- You can use QualiAI to enrich content and add/generate non-graphical relations and objects to existing objects
- The property window has been expanded and it is now possible to do inline editing in the properties directly (see more here)
- Governance actions has been included in the web-modeler (see more here)
- It is possible to filter properties to see only favorite/value-only or all properties (see more here)
Below is a guide on how to use the different features of the web-modeler and at the bottom there are videos that will explain further, along with a list of useful shortcuts.
QualiWare is working on enabling more and more diagram to the web-modeler, below is a list of diagrams currently available in the web-modeler.
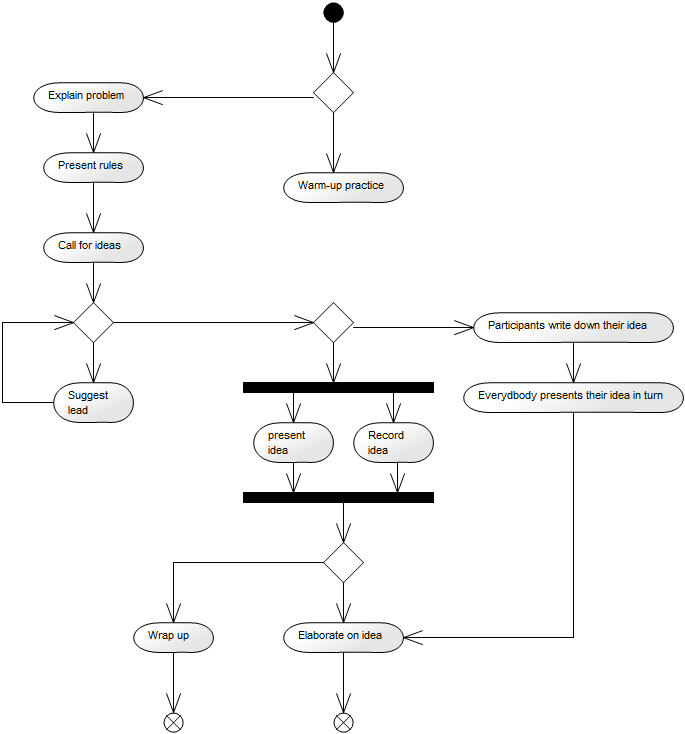
Creating/Editing a Diagram

Adding a Symbol
You can add a new symbol to the diagram the following way:
1a. Either left Click a symbol (a BusinessProcess) from the symbol bar or Drag with your left mouse button and release where you wish to place the symbol
1b. or double-click on the white canvas for a list of available symbols, and select the symbol type you need

2. Give the object (BusinessProcess) a name. Once 3 or more characters of the name are typed, a “search-box” will appear showing all similar objects in the repository of the selected type (BusinessProcess). This enables reuse of objects and/or having unique object names in the repository.
3. Alternatively hover over an object (BusinessProcess) you wish to repeat/clone and click one of the four arrows
- Click to clone and connect
- CTRL+Click to clone
- Shift+CTRL+Click to connect
- Click and drag to draw connection and end with double click to connect to a new symbol (a list of allowed symbols will be shown)
4. A new object (BusinessProcess) will appear. If multiple connection-types are allowed between the two symbols, select the desired connection-type from the menu. Then double click the label and name the new object (BusinessProcess).

Re-using Symbols
Another way to find and reuse a symbol is described below:
- Select the object (BusinessProcess) and double click the name to highlight the text
- Right click the name to open a list of existing objects (business processes)
- Browse the list to find the object (BusinessProcess) you’re looking for. Try to sort the columns differently by clicking the column header or enter a searchstring in the search field to narrow down you last.
- Select the desired object (BusinessProcess) or click ‘Create New’ if you didn’t find what you were looking for. Finish by clicking ‘Select’ to return the selected object (BusinessProcess) to the diagram


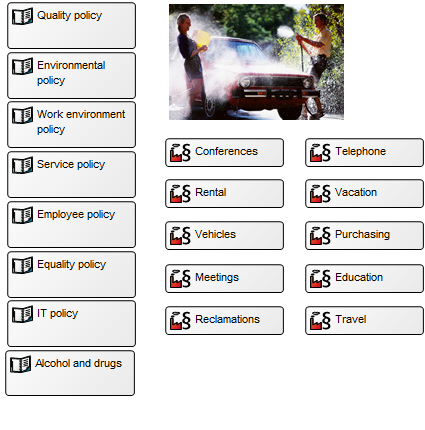
You can also explore the existing objects in the repository.
If you select the “Explorer” in the left window, you get a full list of all existing objects in the symbol pane to select from.
From the explorer view you can unfold/fold the different symbol types and reuse an object in your model by drag and dropping the object on the canvas.
Connecting Existing Symbols

- Hoover the source symbol and select the arrow on the side of the symbol where the connection should start.
- Drag the arrow with the left mouse button and release it on top of the target symbol
- Select the desired connection type from the popup menu
- Use the green selector points on the connection to move sections of the connector to different positionsTip: To find the easiest route between two symbols just select the connection and press the ‘Space’ key
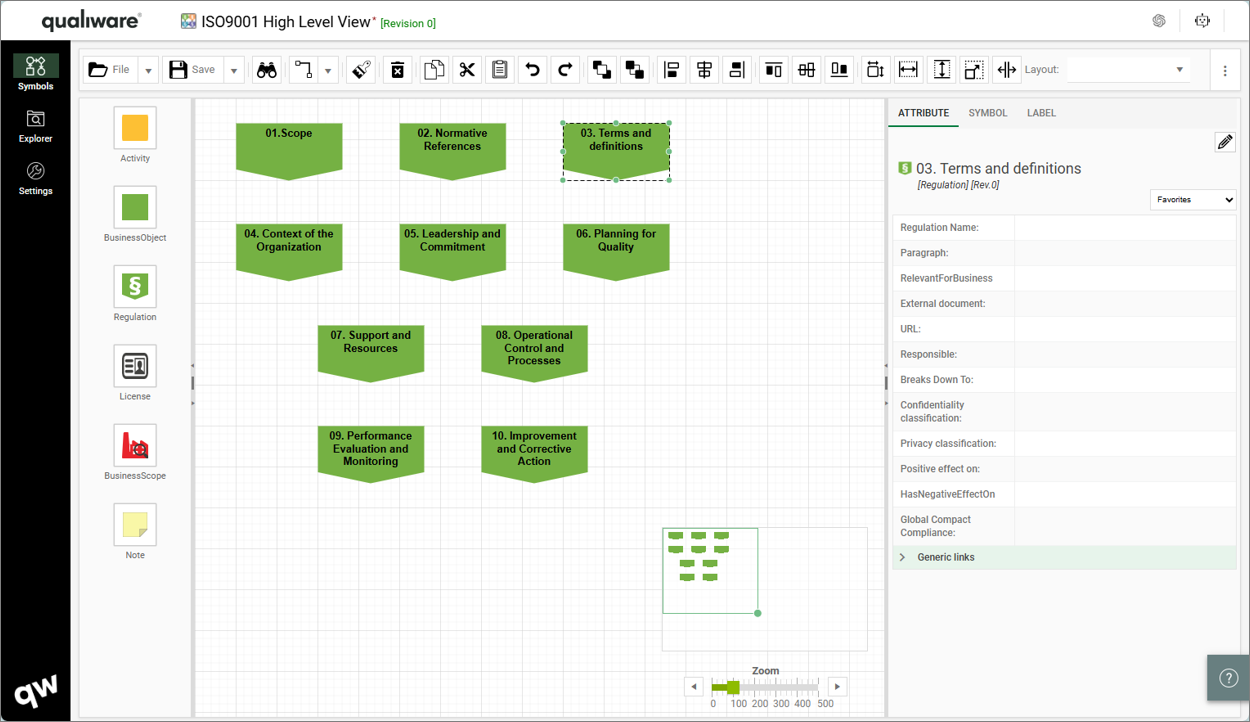
Property Window – Modify Attributes, Symbol and Label Properties
When you select a symbol on the canvas a property window appears on the right side of the diagram canvas.
- The ‘Attributes’ tab shows properties of the diagram/selected symbol and enables you to edit the diagram/object
- From the ‘Label’ tab it is possible to edit the symbol label style
- From the the ‘Symbol‘ tab to edit graphics style of the symbol

In QualiWare 10.10 the Property window has been extended to show more properties, and in addition:
- The property window has been expanded and it is now possible to do inline editing in the properties directly (see more here)
- Governance actions has been included in the web-modeler (see more here)
- It is possible to filter properties to see only favorite/value-only or all properties (see more here)

Editing Toolbar
Sizing

- Use the buttons in the toolbar to align symbols
-
- First select the controlling symbol (the symbol with the correct size/width/height. Then hold the shift key down and select the symbols you wish to change.
- Then press one or more of the action buttons
- Resize to original size
- Align width (with first selected object)
- Align height (with first selected object)
- Align size (with first selected object)
Alignment

- Use the buttons in the toolbar to align symbols with first selected
-
- Align left edge
- Align vertical center
- Align right edge
- Align top edge
- Align horizontal center
- Align bottom edge
-
- Align horizontal spacing with first and last selected
- Align vertical spacing with first and last selected
Layouts
You can shift between different layouts.
The Web-modeler will automatically organize the objects according to the selected layout.

Import model from Text or Table
Text to Model
- Select “Import from Text”
- You can type in/insert text in the “Text to Model” box
- NOTE there is a short guidance text for how to insert text when using the default setting for the Connection and Hirarchical layuot types
- The model will be created based upon the “Settings”
- Here you can choose between different Layout types, to which template(s) the inserted text should be “translated”, select Seperator, and specify symbol size.

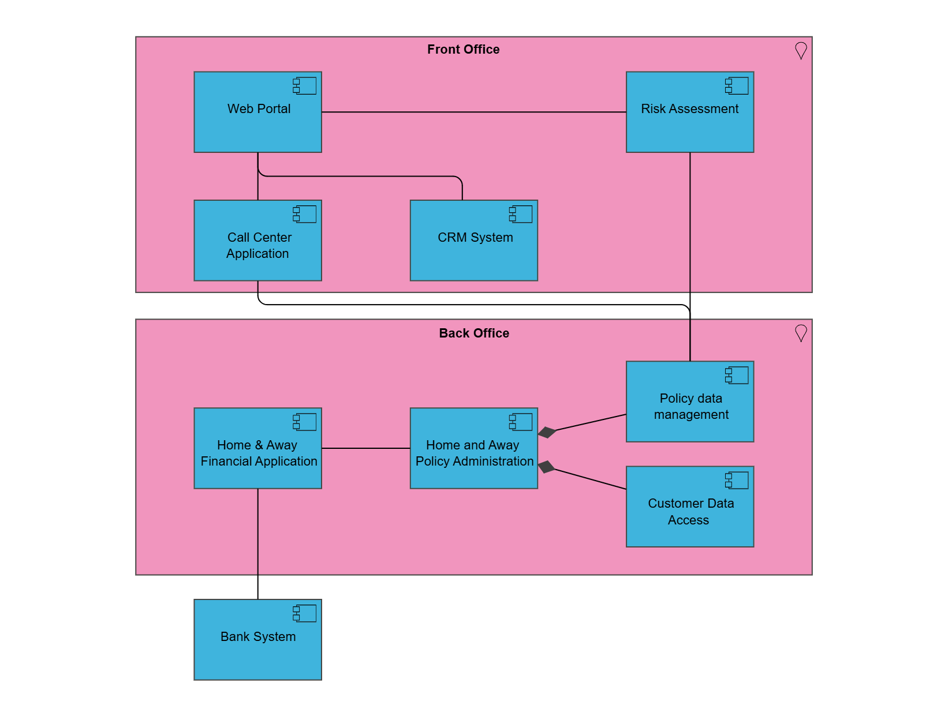
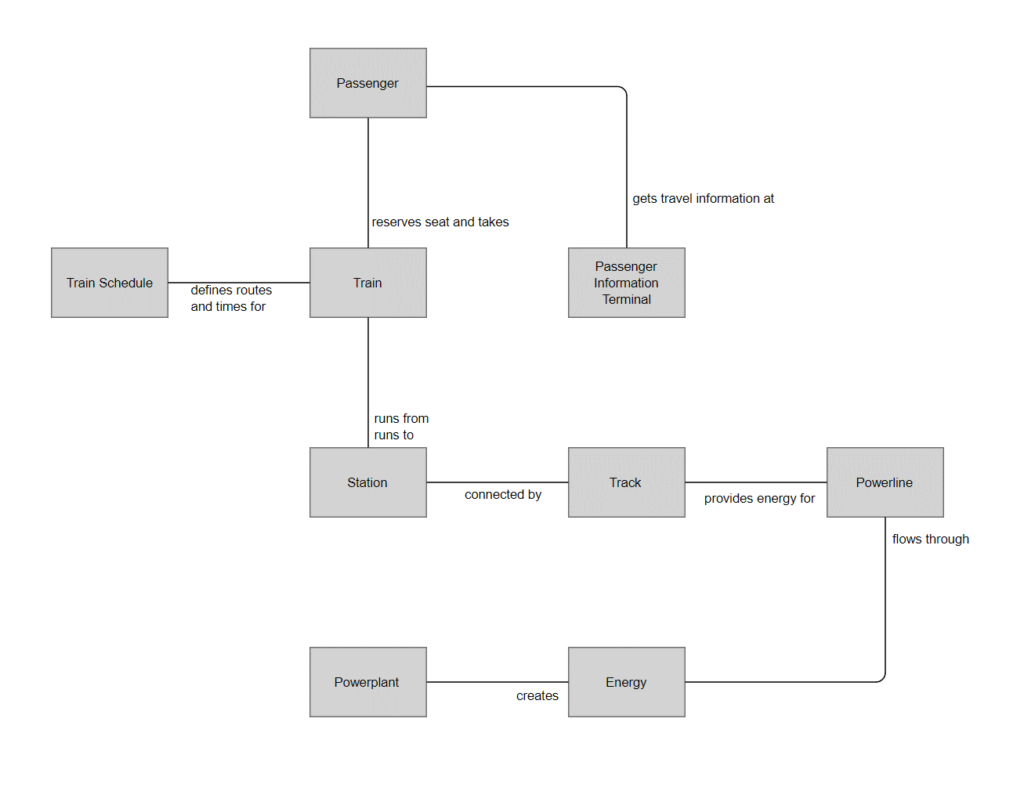
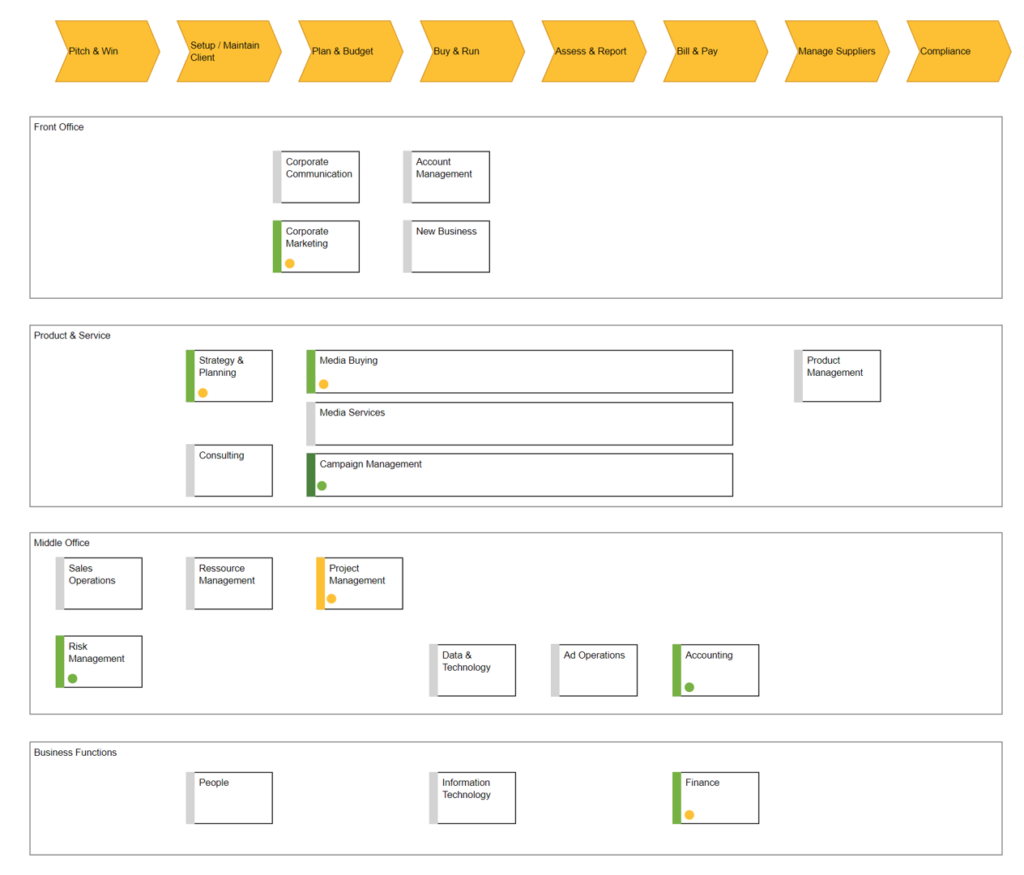
Table to Model
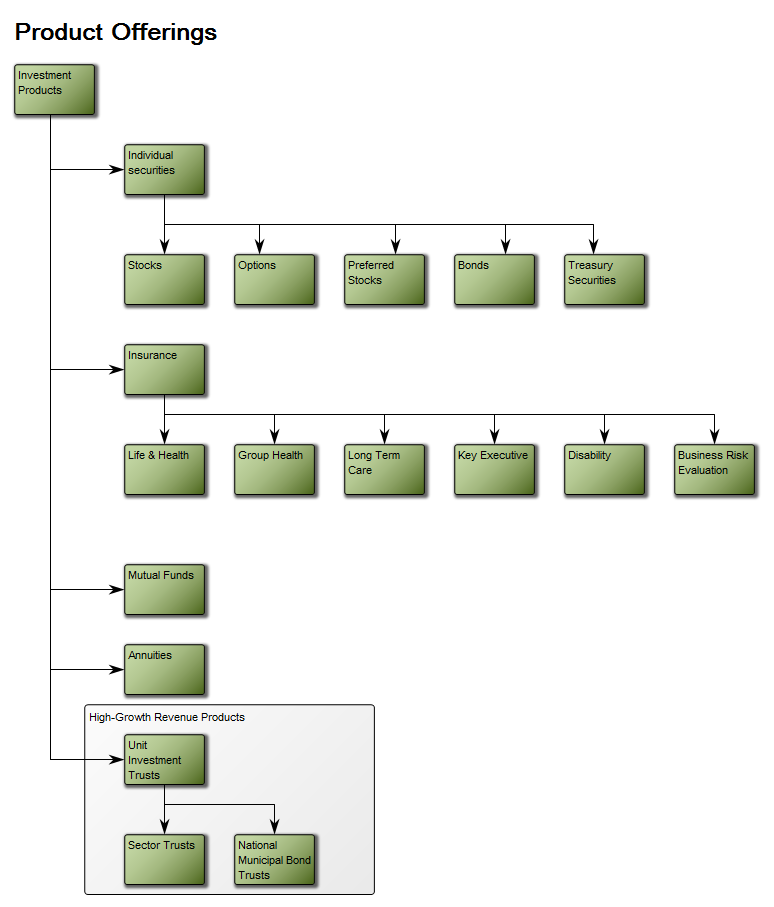
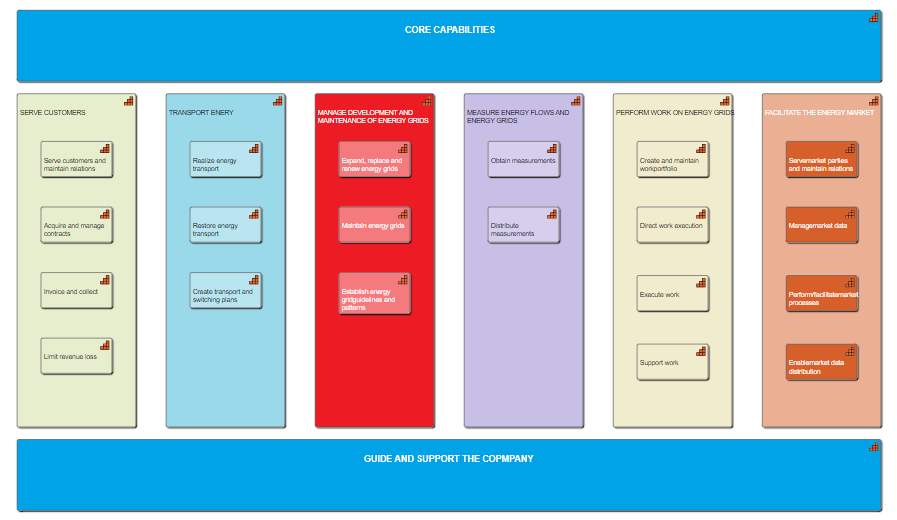
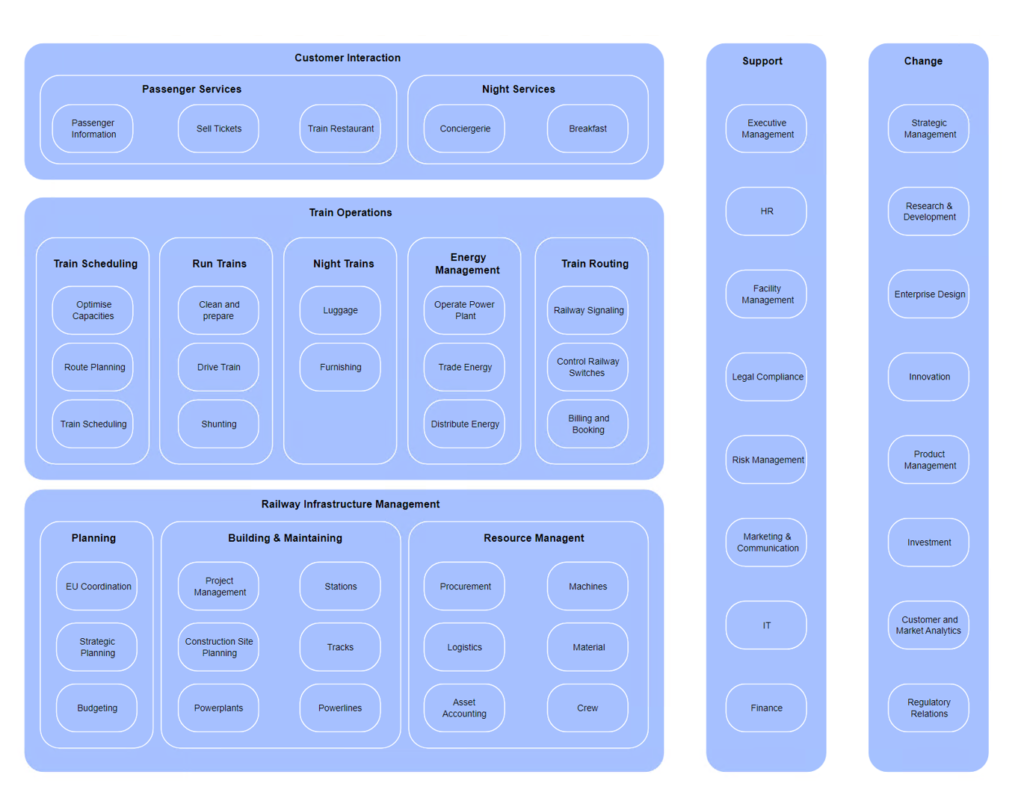
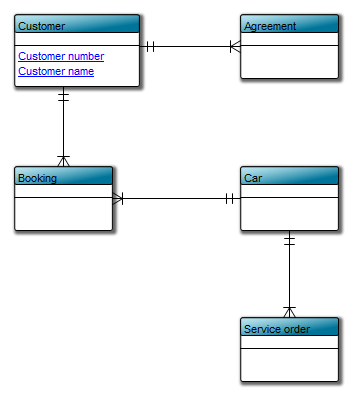
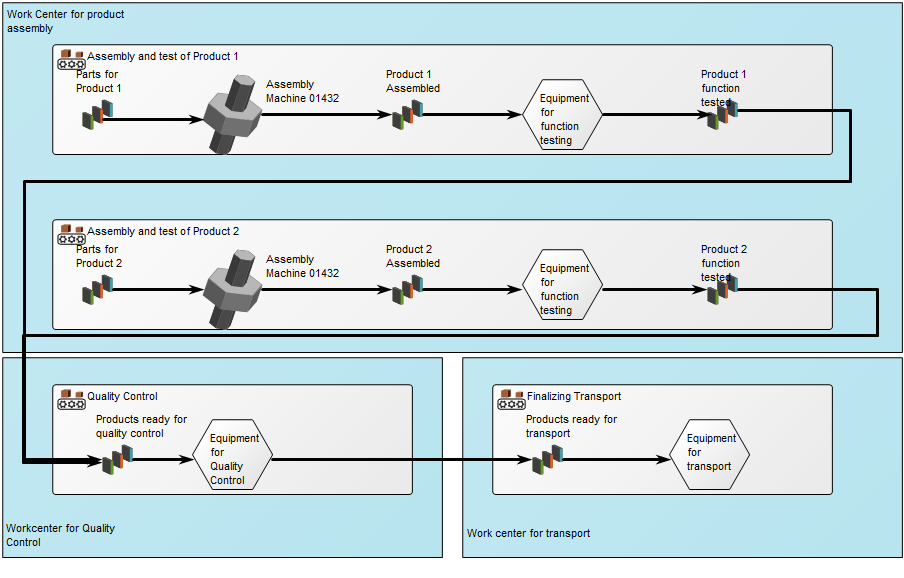
- The import from table can be used to easy draw workflow-diagrams and box-in-box diagrams
- Once you type in the columns in the table the model will be created
- You can select/change symbol template for the symbol
- When you refer to a symbol in “Connects To” column the symbols will be connected (activities in the same row will be auto connected)


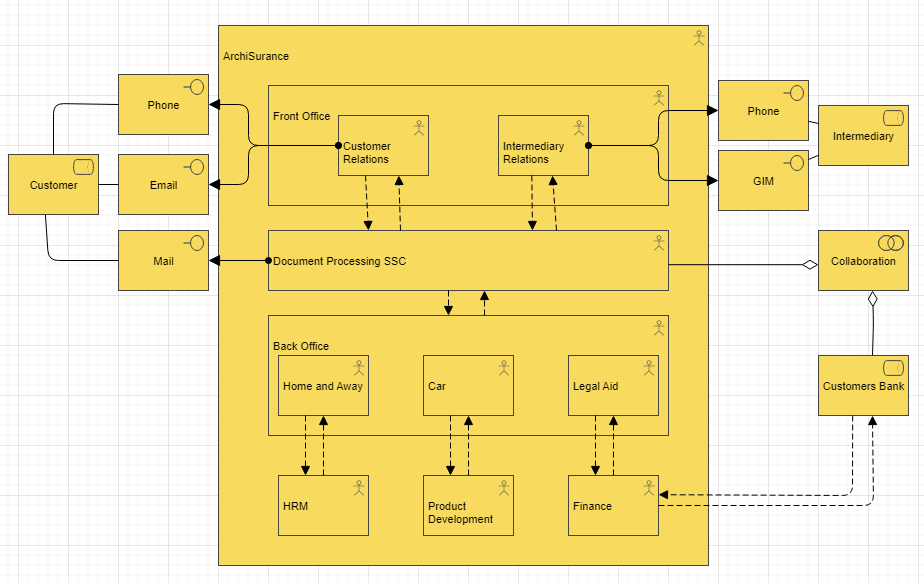
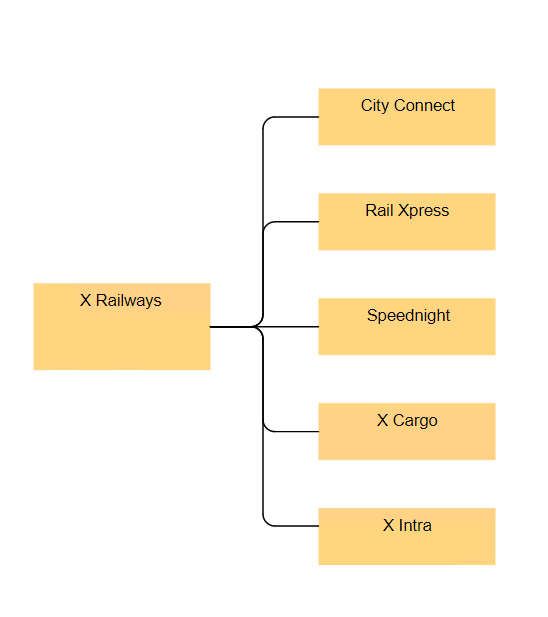
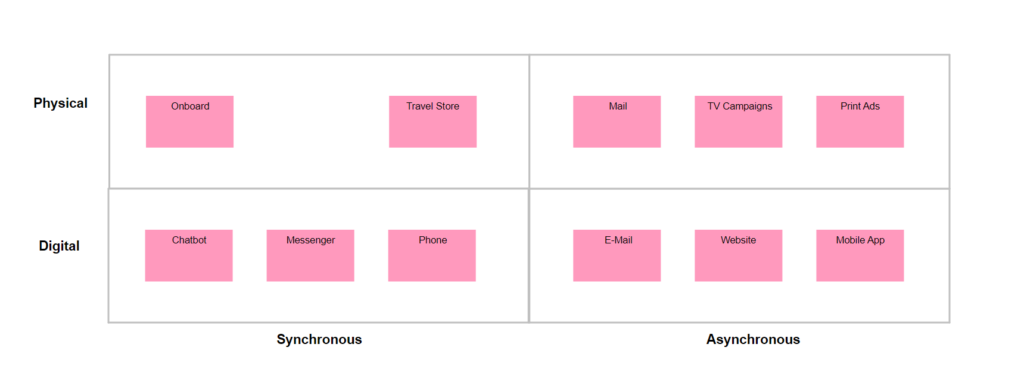
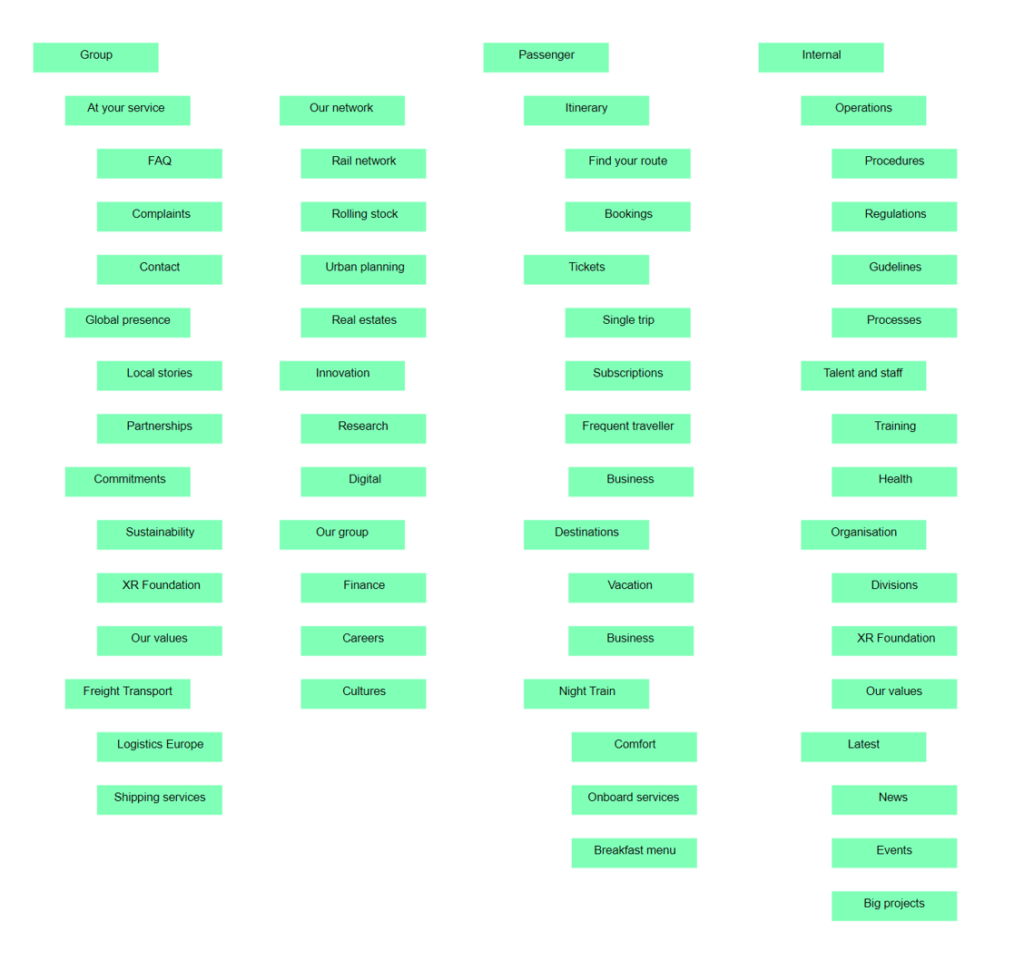
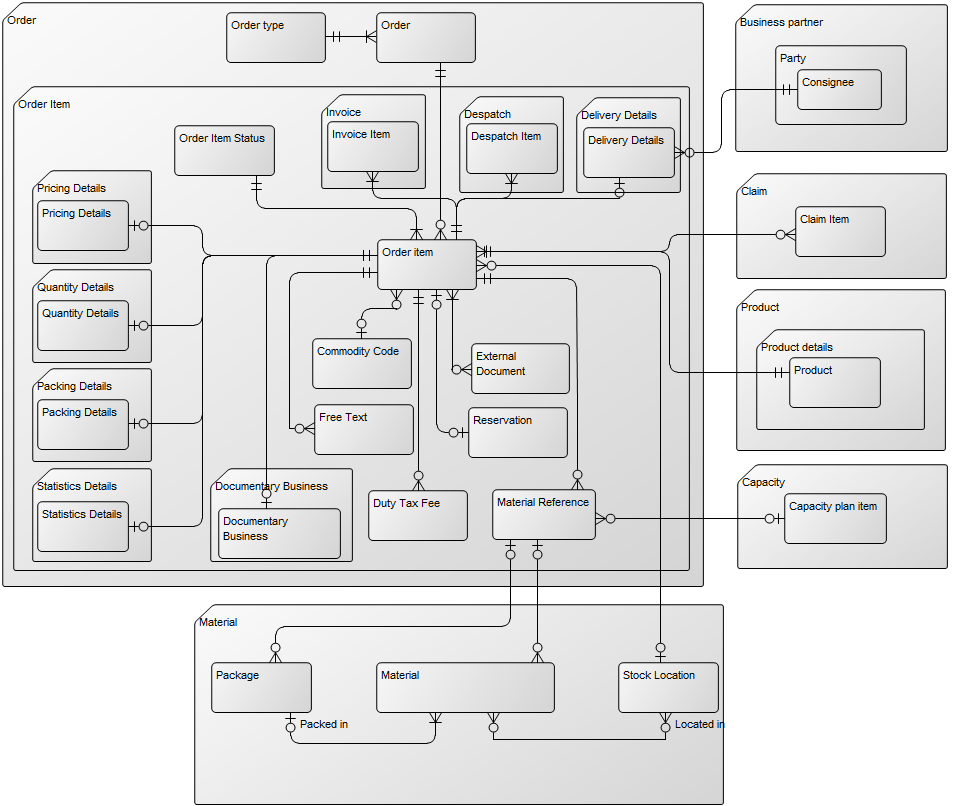
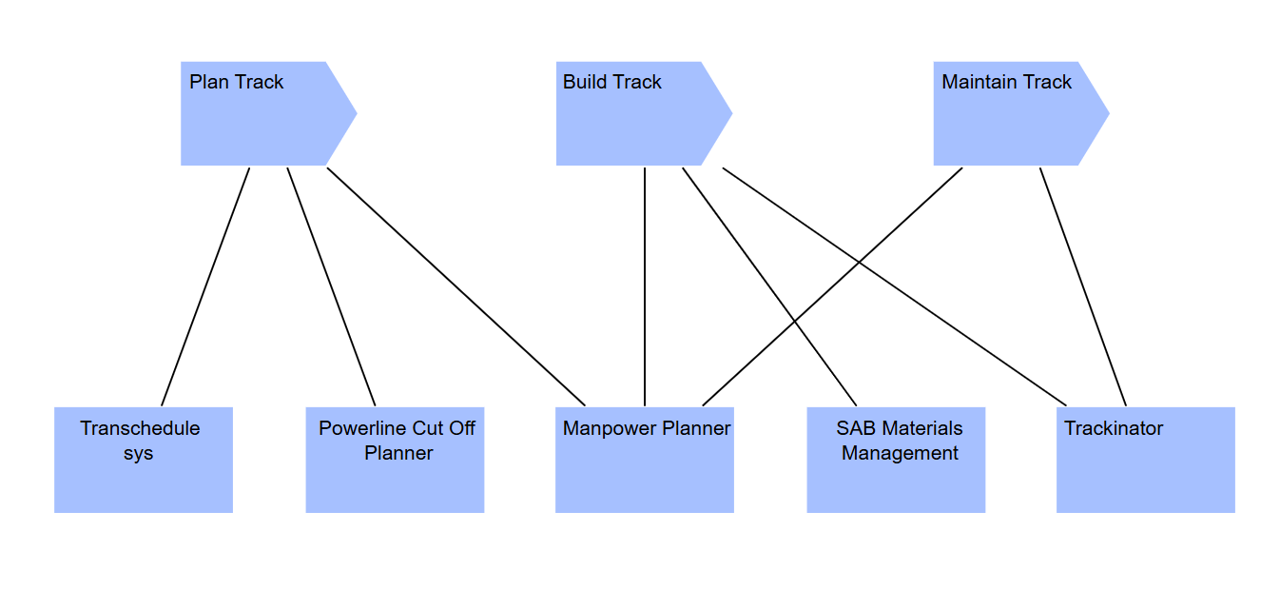
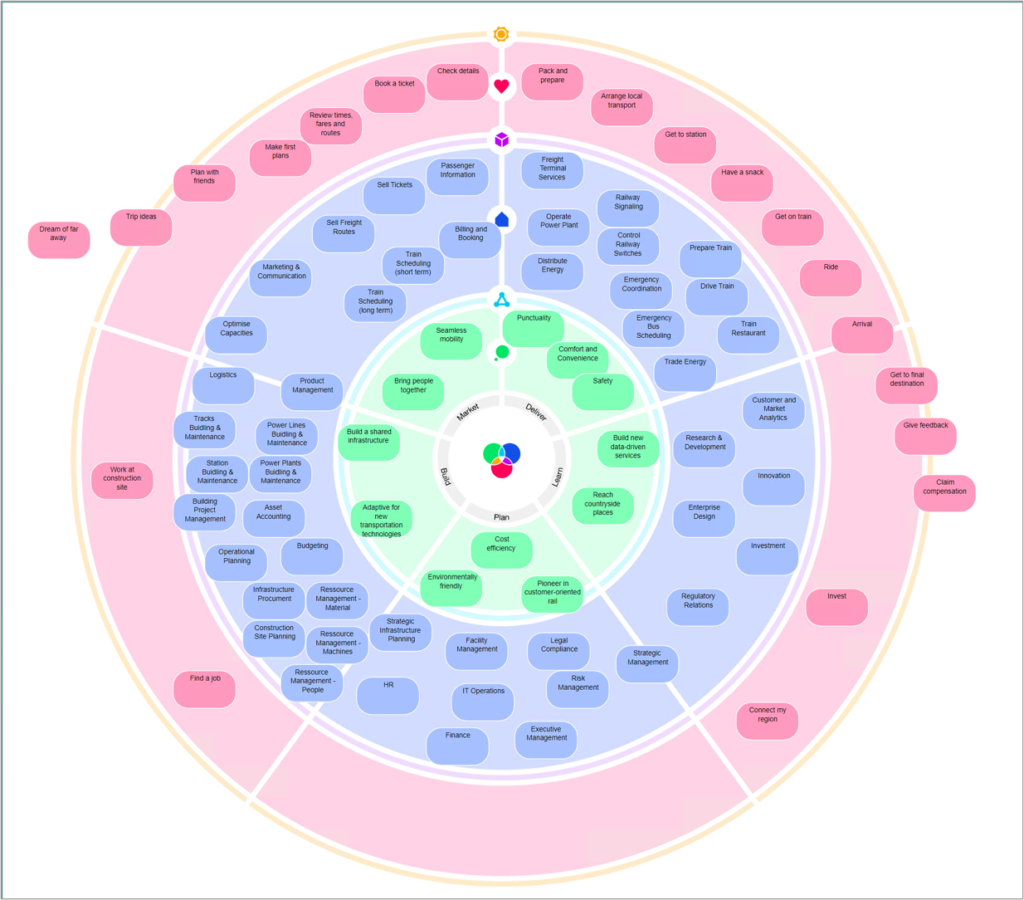
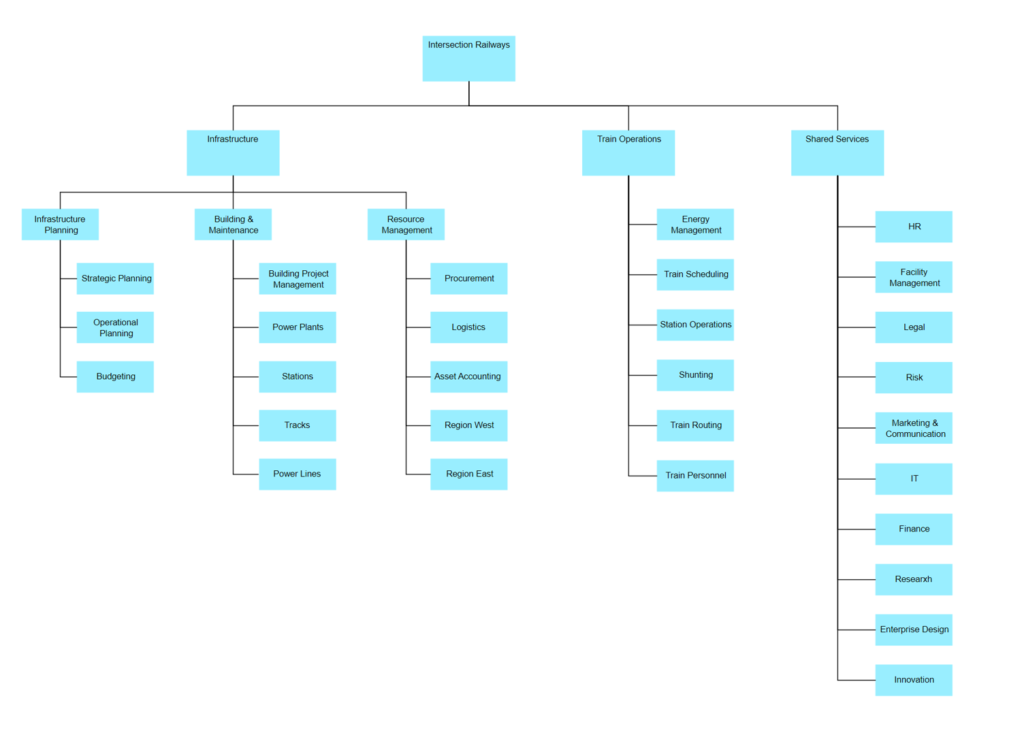
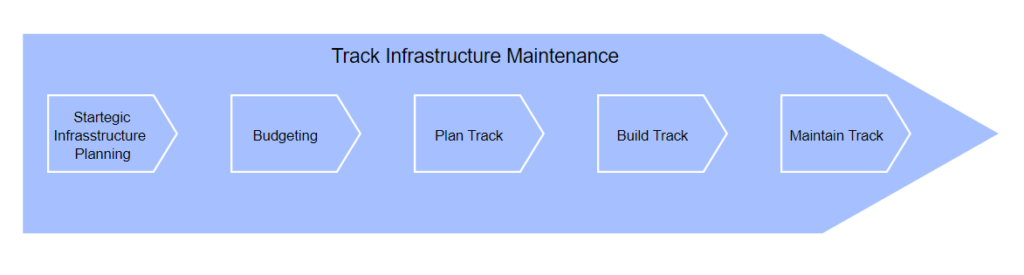
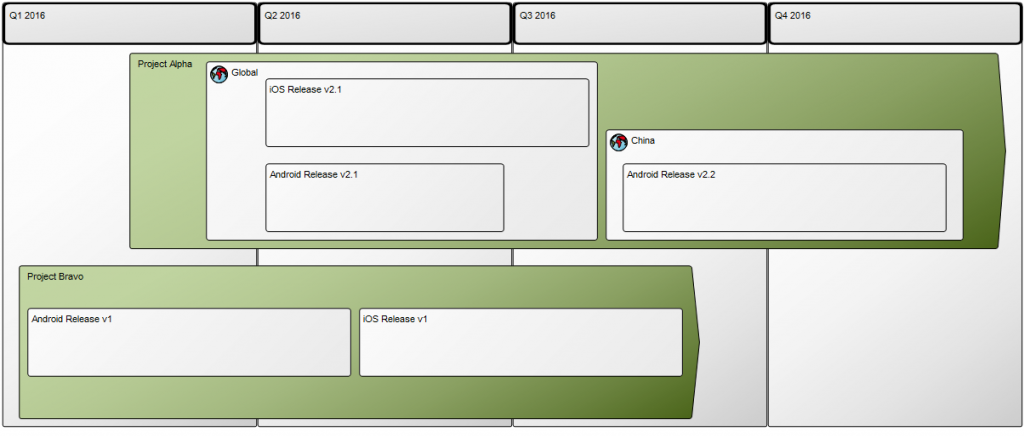
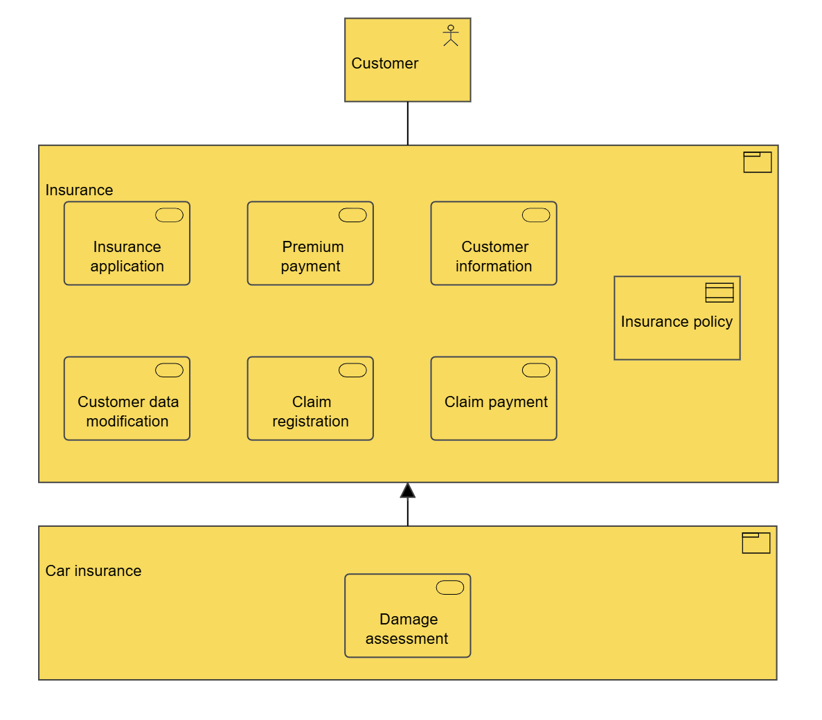
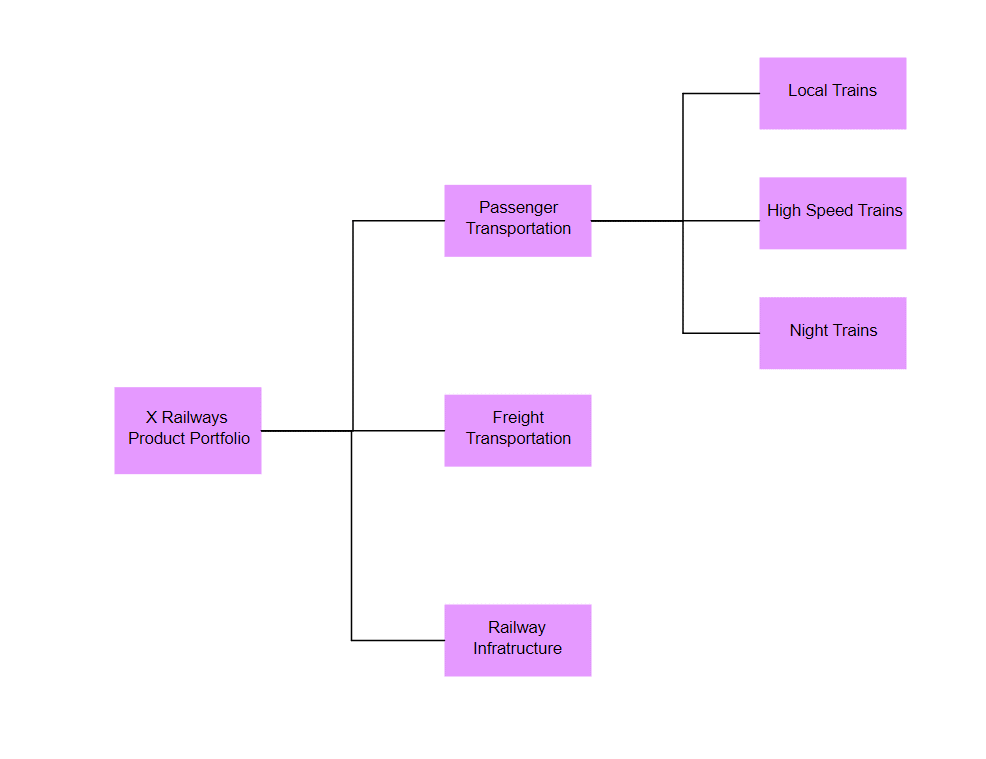
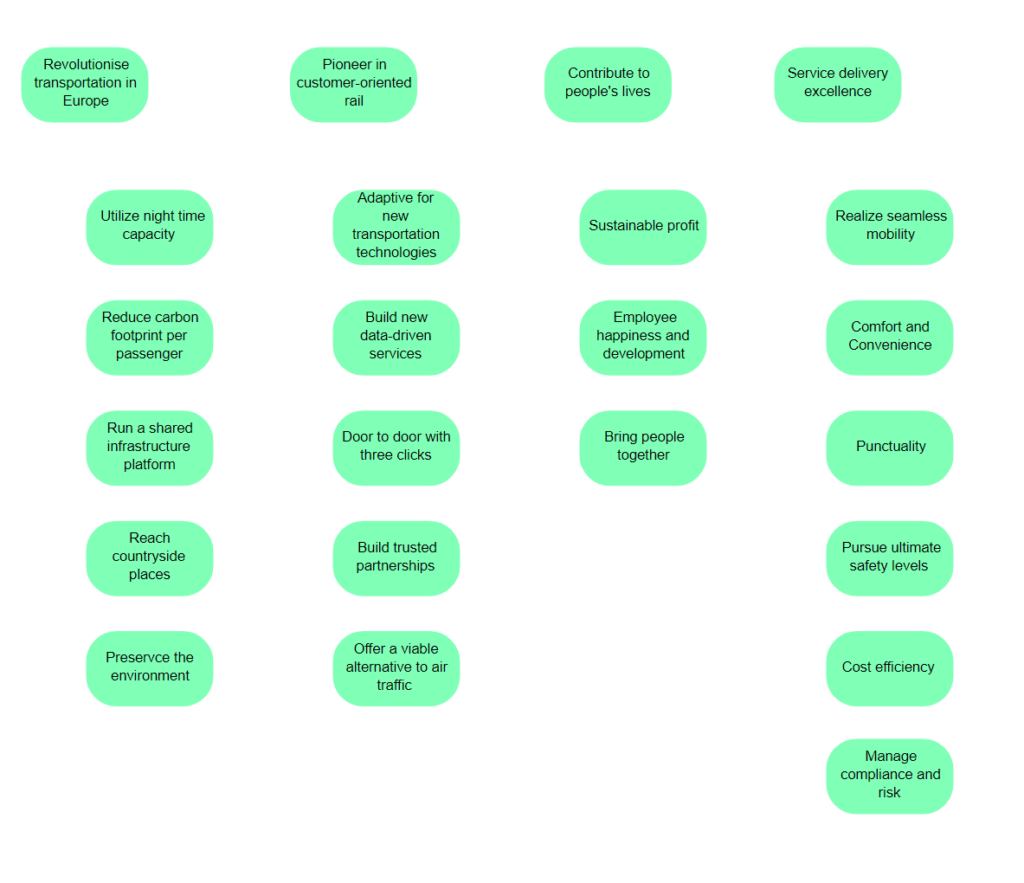
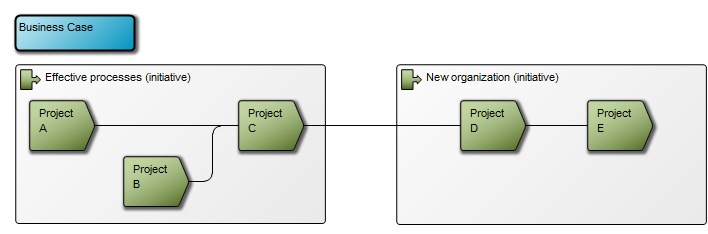
Below is an example of a box-in-box diagram (Business Capability Model), created using the table to model feature.

The table to model settings can be configured via the HTML Model Generator Settings template.
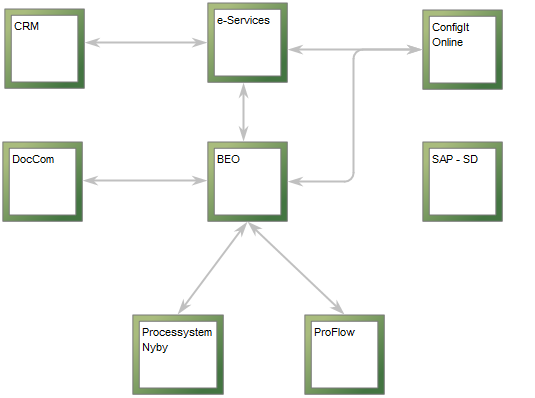
Multi diagram support in web-modeler
QualiWare 10.9 introduced multi diagram support in the web-modeler:
- it is possible to open multiple diagrams in web-modeler
- select “Overview” in the left window to see all open diagrams
- you can select between the diagrams from the tabs in the bottom


Paste picture on symbol
From QualiWare 10.9 it is possible easy to pasta a picture on a symbol in the web-modeler.
This can be used to make your models more graphically and personalised.

Graphical compare in web-modeler
From QualiWare 10.9 it is possible to compare two revisons of a diagram in the web-modeler.
Select “Compare revison” in the File menu, and select the revions you want to compare with the most recent version.

The feature creates a new tab with a graphical comparison. In the right pane you can select the revision you what to compare with the current revision. The windows highlighst the changes in the objects between the two revisions.

Inline editing of object properties e.g. directly from preview
From QualiWare 10.10 it is no longer necessarily to open an object to edit its properties.
You can toggle on the “Inline Editing” and then double-click on the specific property in the property tile to directly edit it.
It is possible to inline editing in all attributes preview lists, both in the web frontend, visualizer, repository explorer and in the web-modeler.

Favorite/full/Value-only support in properties
In the property view in the Web-Modeler (from QualiWare 10.10), it is possible to toggle between full view or favorite property view, and in full view it is possible to hide empty properties, only focusing on the properties that are described/instantiated.
The list of Favorite properties is determined by the properties defined by the Properties in the Properties tile in the associated diagram. This way, you get easy access to the favorite fields that are used in the organization. The Properties are configured in the HTMLContentTable associated with the template, as defined in the context dependent tile.

Governance support in Web-modeler
It is now possible to perform governance actions directly in the web-modeler.
This enables you to e.g. create new revisions of frozen objects and update them without exiting the web-modeler.

Read more about governance workflows here.
Videos demoing the Web-modeler:
Useful Shortcuts in the Web-modeler
F2 Rename the selected object.
F3 Search.
J Align the selected objects respective of the first selected object.
S Copy the Size of the first selected object to all the subsequently selected objects.
Spacebar Automatically re-draw the selected connections.
ALT + Left-click Selecting an object and ALT+ Left-clicking on an object’s label opens the label editor.
ALT + Left-click + drag ALT+Left-click a label/button panel while moving the mouse, moves the label/button panel.
CTRL + A Select all objects in the diagram.
CTRL + F Find a symbol in the diagram.
CTRL + G Toggle the drawing grid.
CTRL + Y Redo.
CTRL + Z Undo.
Arrow-keys Move the selected object in the arrow key direction.
Shift + Z Automatically zoom to view the entirety of the model.
hold Z + Left-click + drag Zoom to the window selected by the mouse.
1 Zoom to 100%
Shift + CTRL+ Left-click + drag Create/remove space between objects in the direction of mouse movement. This will move all object(s) to the right and below the mouse click (shown by support lines)
Download the shortcuts-list in pdf:
Web-Modeler enabled diagrams
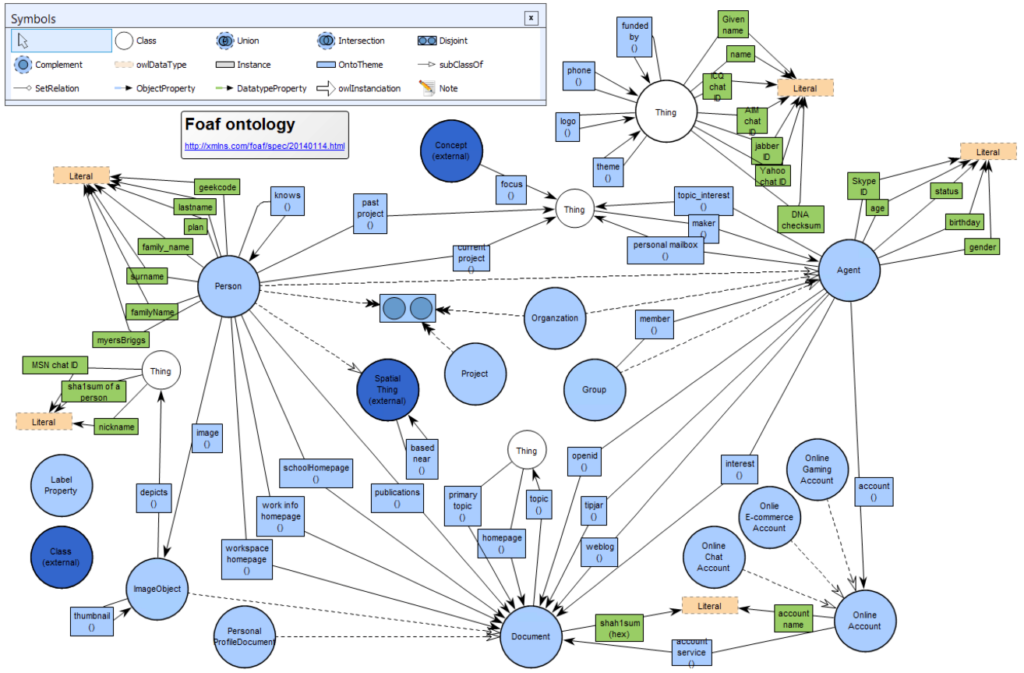
You can explore all the templates (diagrams, symbols, connectors, system and non-graphical templates) in QualiWare here.
- All
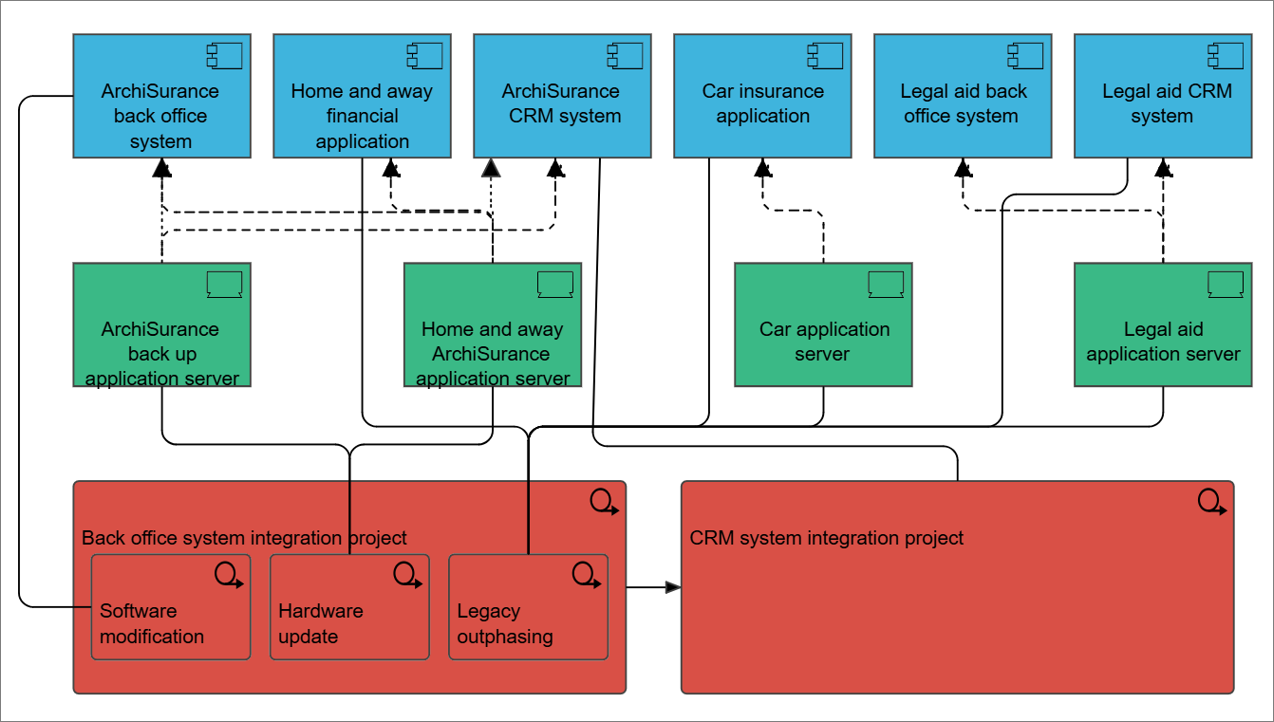
- Application
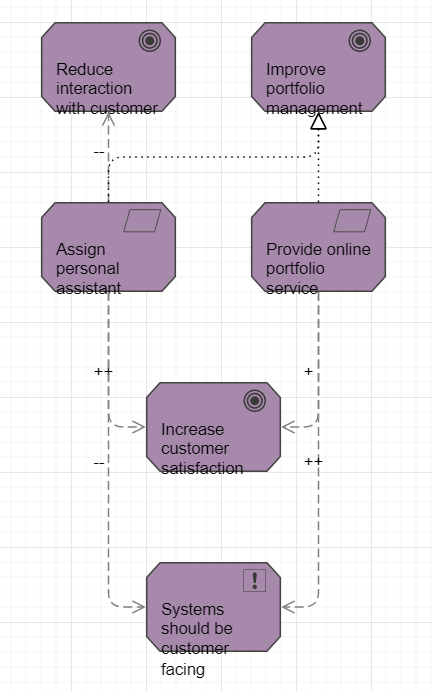
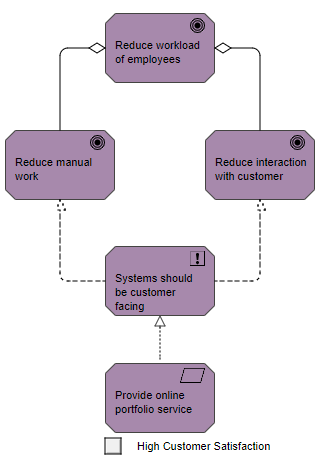
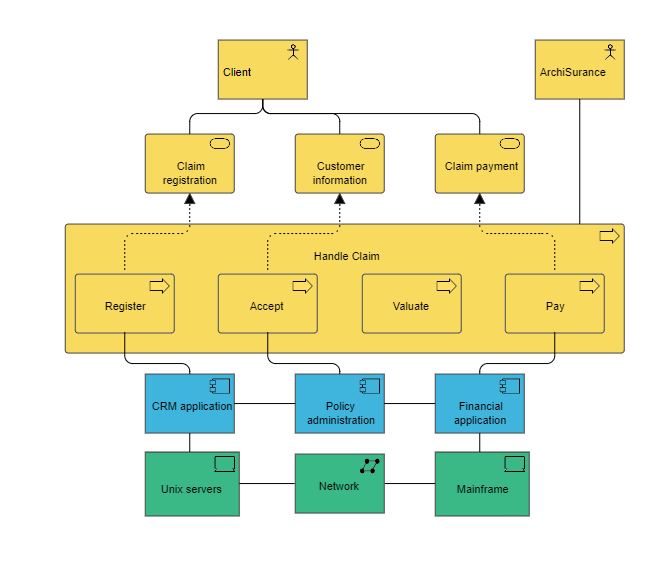
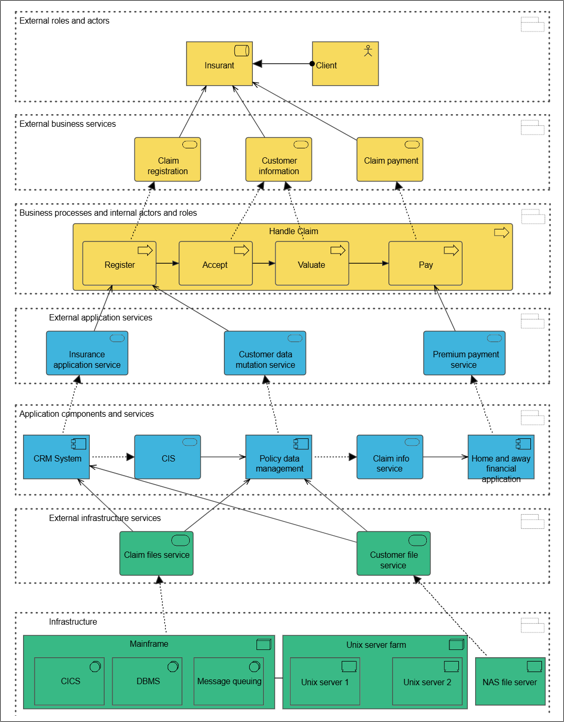
- ArchiMate
- EDGY
- Information
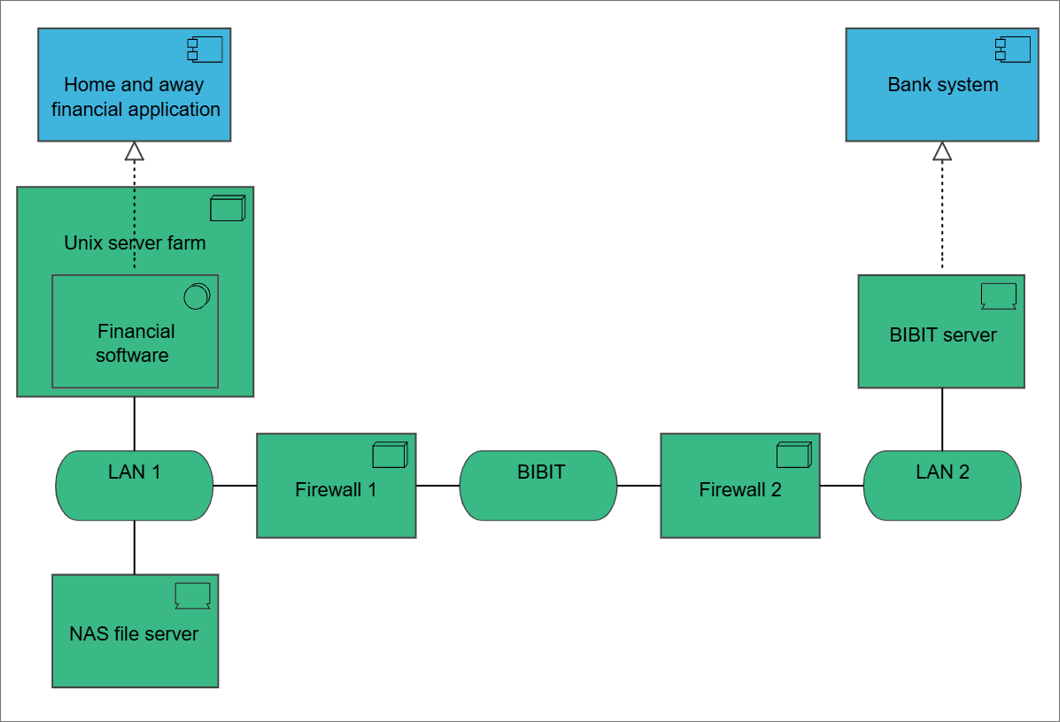
- Infrastructure
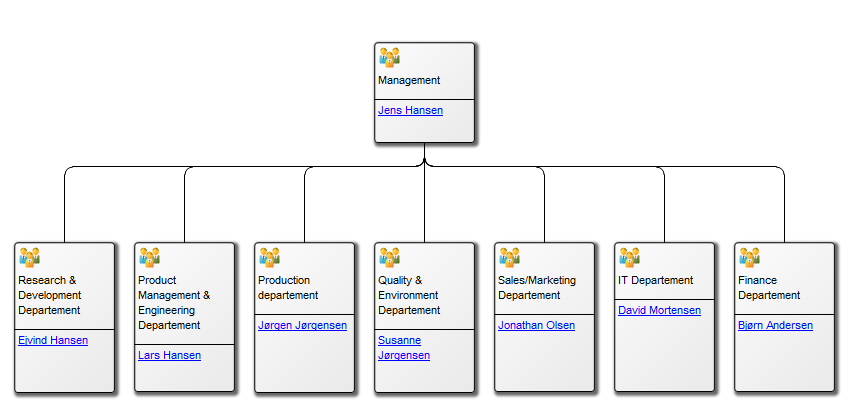
- Organization
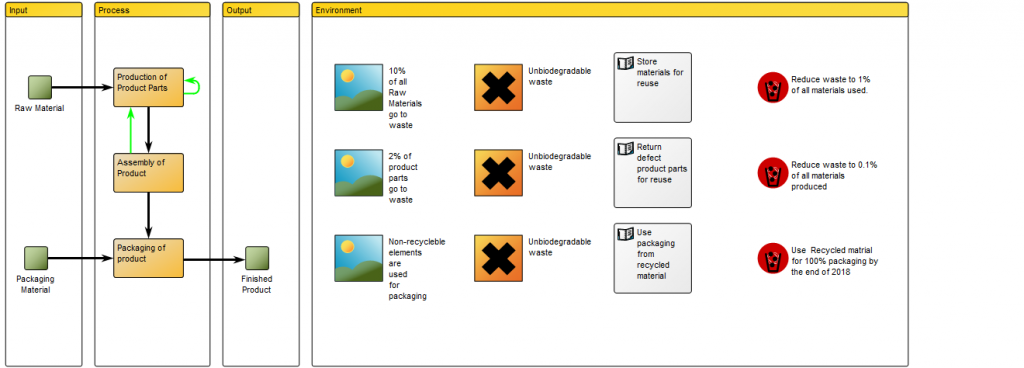
- Process
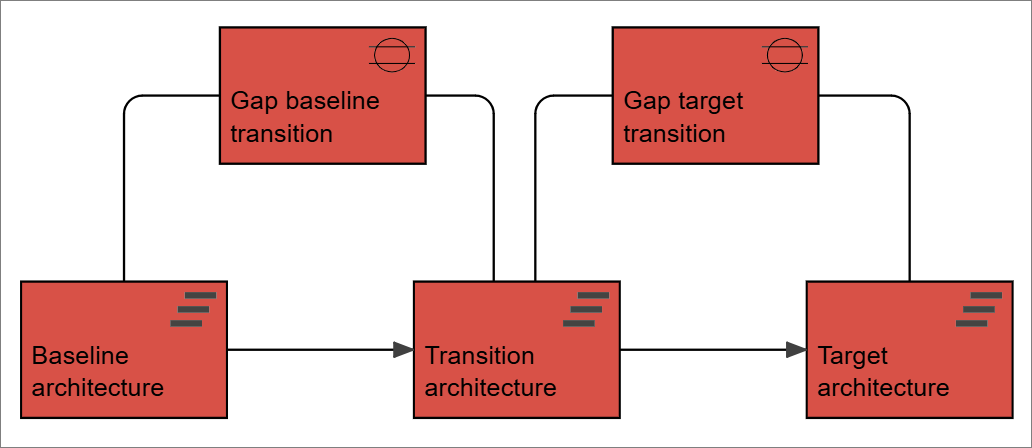
- Strategy
- Technology