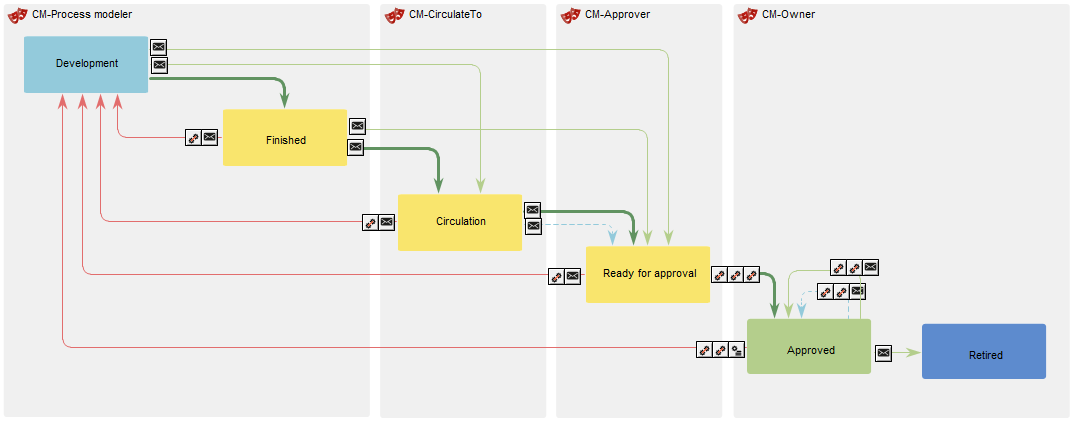
The GovernanceActionList or a single GovernanceActionMethod is used in relation to a GovernanceWorkflow and can be activated when doing a transition (GovernanceTransition/GovernanceConditionalMessage) either before (pre) or after (post).
It can also be activated when an event happens (GovernanceEventMessage).
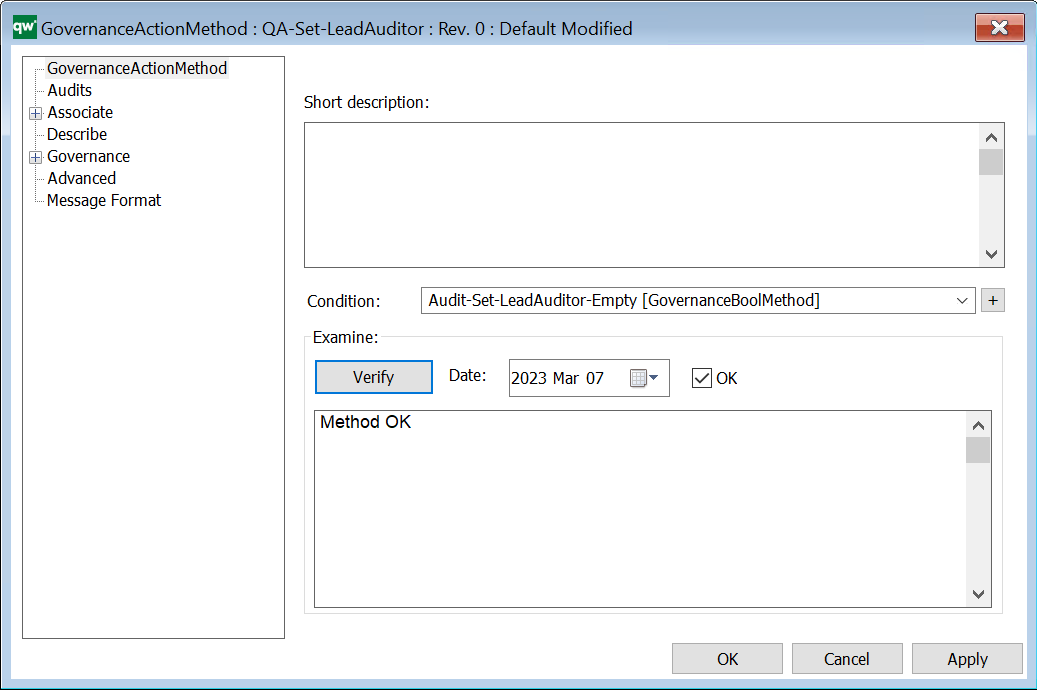
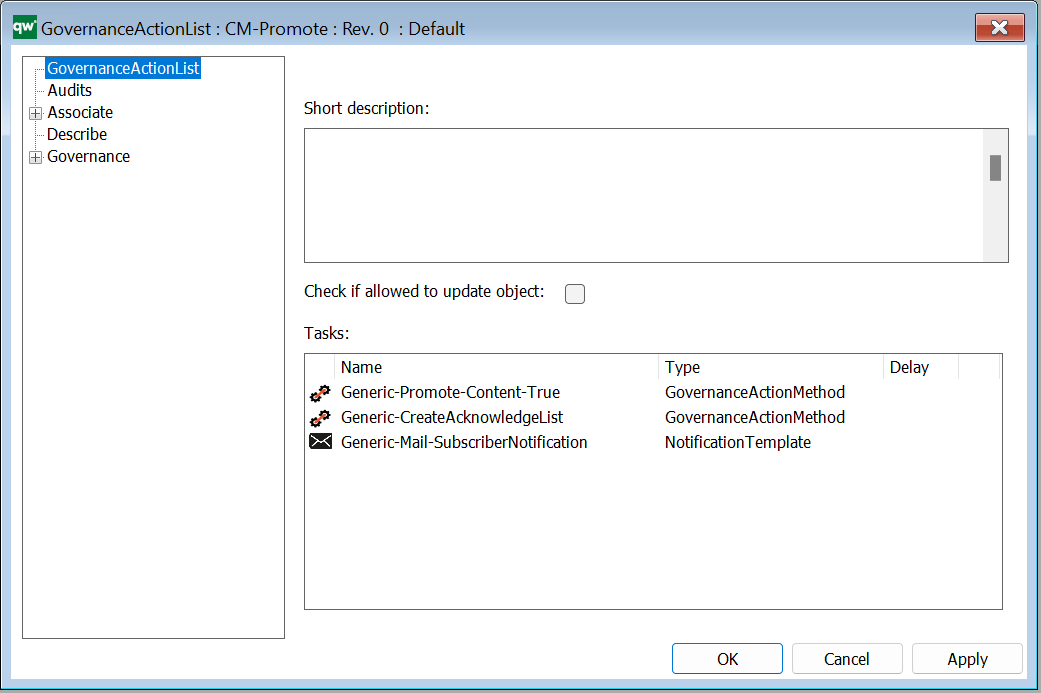
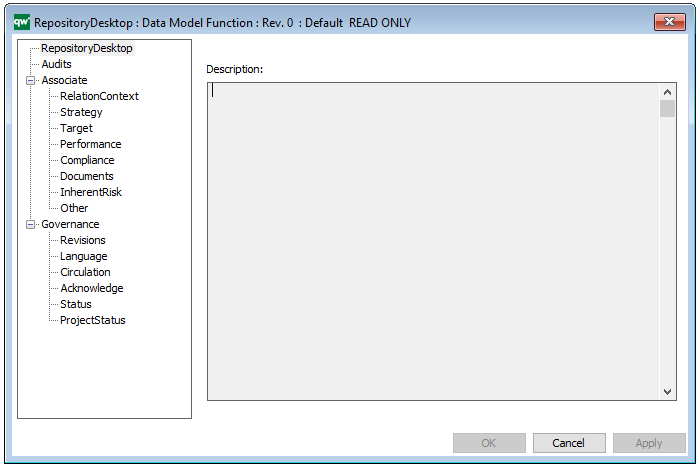
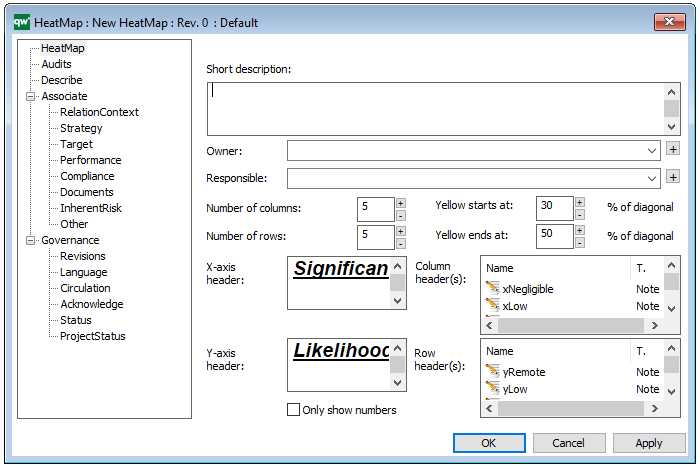
Short description: Here you give a short description of the GovernanceActionMethod. This should be able to give the user an overview of the feature.
Condition: Contains a GovernanceBoolList or GovernanceBoolMethod (the action will not run if it does not evaluate to true).
Verify: Verifies the Method. If the action is verified, today’s date, OK checkmark, and a “Method OK” will be filled out.
GovernanceActionMethod – Advanced
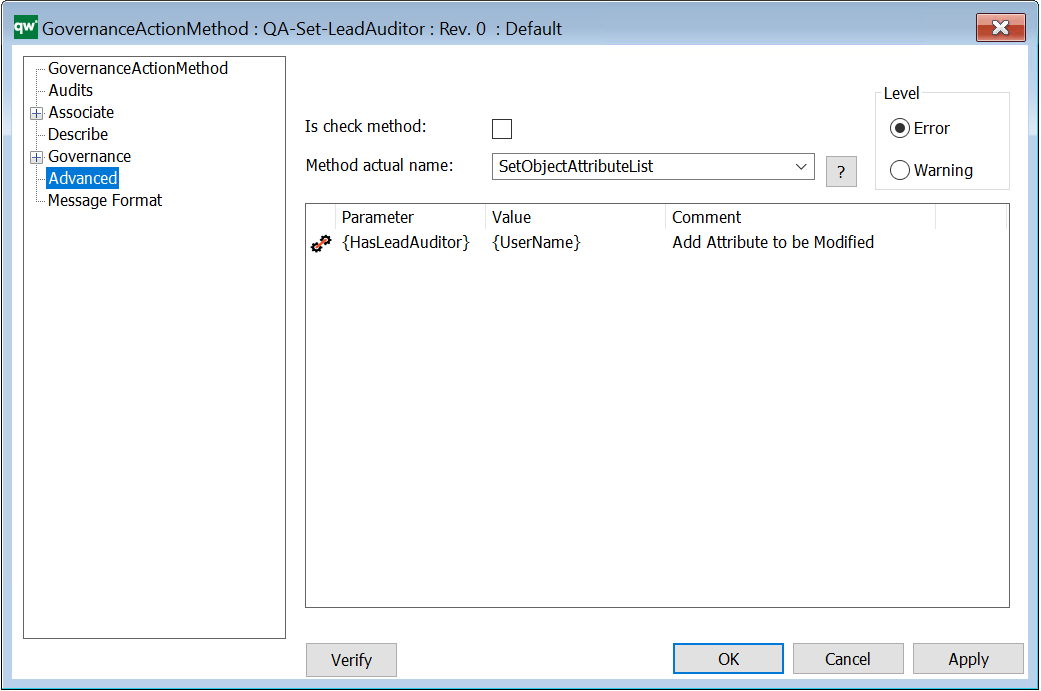
Is check method: Indicates if the action should check specified conditions on the object or if the action should be run on the object.
Method actual name: The name of the C# function to run. There is a set of predefined methods available.
- A list of check methods is available, see section 10.2.2
- A list of methods that are not check methods is available, see section 0
It is also possible to define a custom function.

You can click the icon to get some help to the selected Method.
Level: In case an error occurs during action execution, this is the error level to be used to inform the user.
- If level is set to Error, the action will stop executing and all following actions (see GovernanceActionList) will not run. An error message is displayed to the user.
- Example: If the action is set to run as pre-action on a transition and the action fails, it will result in the transition not happening. The object will remain in the state it is already in.
- If level is set to Warning, the action will stop executing. Any following actions will still run. A warning message is displayed to the user.
- Example: If the action is set to run as pre-action on a transition and the action fails, it will result in the following actions to be run. If these actions do not fail, the transition will be successful.
Parameter: Corresponding parameters – predefined for the current possible methods.
For most of the methods there are some parameters that can be set. Right click in the window and select: “Add Parameters…” to get the list of parameters.
The parameters are predefined for the GovernanceActionMethods in the standard GovernanceWorkFlow, but can be configured/customized.
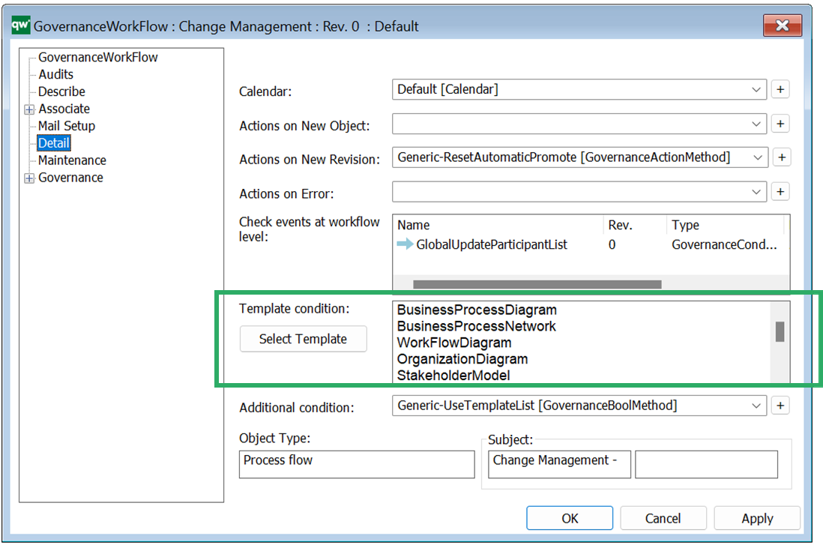
For some methods Relations and Template filter and/or Attributes to be checked can be added as Parameters.
Predefined methods for when the action is not a check method
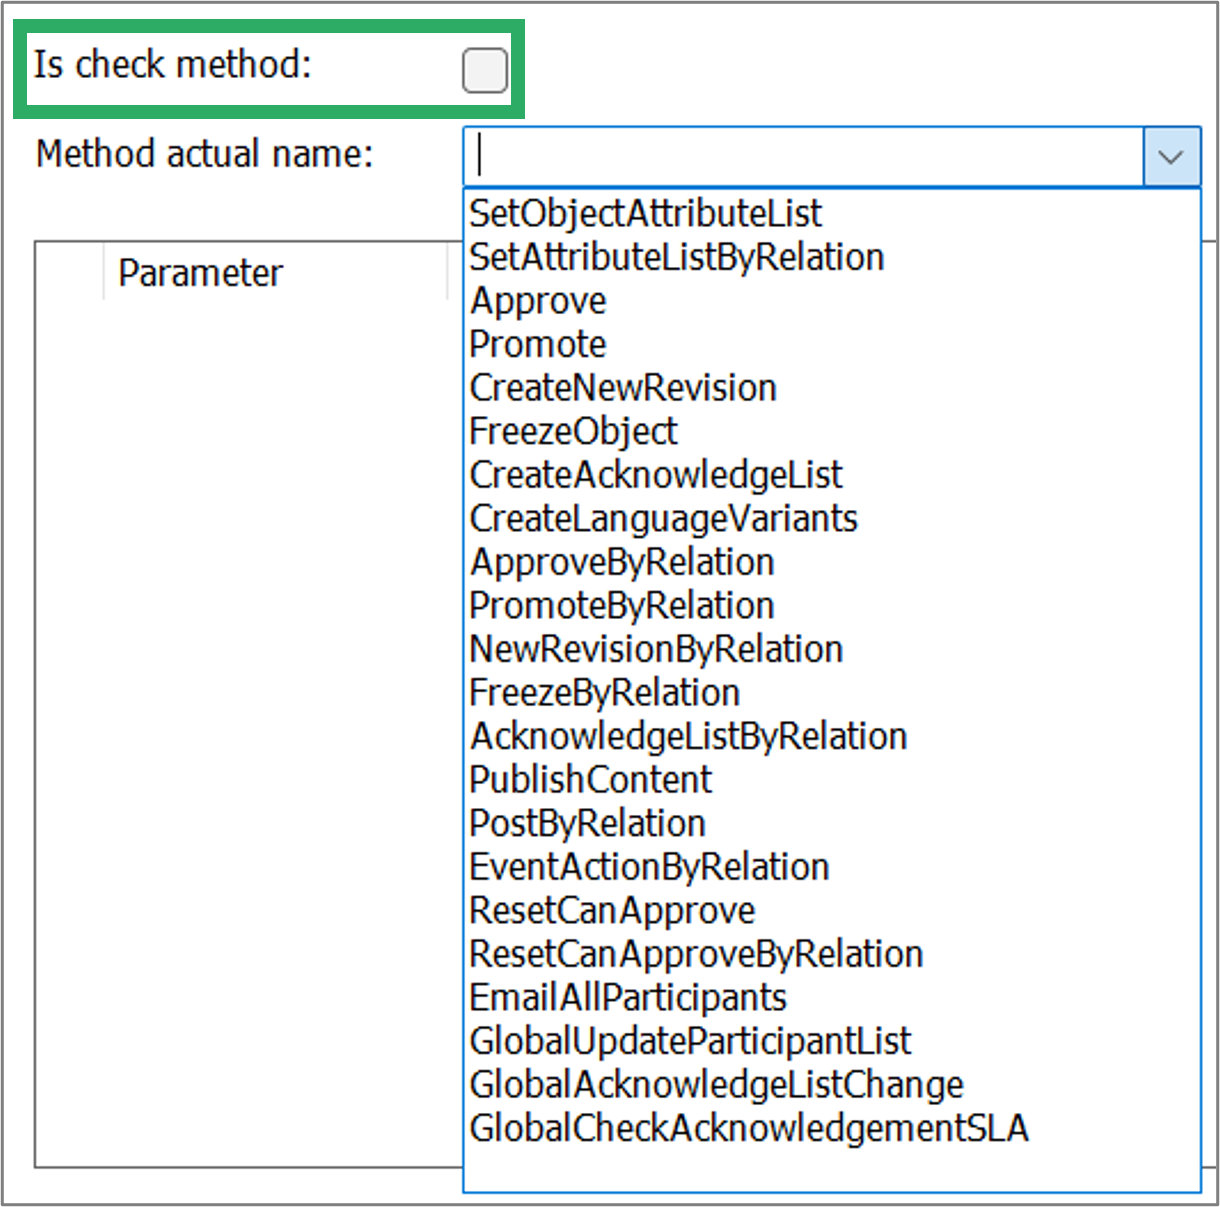
Each of the Predefined GovernanceCheckMethods – when the action is not a check method is explained in the following table. Where available the standard parameters are shown for each of the methods. Note that each of the Values needs to be specified, see below.
| Method | Description |
| SetObjectAttributeList | Set one or more attributes on the object. |
| SetAttributeListByRelation | Set one or more attributes on objects related to the current object. E.g. content of a diagram. |
| Approve | This will approve the object. Parameters control if content of models should be approved along with the parent model. If content will be approved along with the parent, it is also possible to define if content controlled by GWE will follow the parent or follow its own GovernanceWorkFlow. |
| Promote | This will promote the object. Parameters control if content of models should be promoted along with the parent model. If content will be promoted along with the parent, it is also possible to define if content controlled by GWE will follow the parent or follow its own GovernanceWorkFlow. |
| CreateNewRevision | This will create a new revision of the object. Parameters control if object should be published. |
| FreezeObject | Freezes the object (it will be readonly). (No parameters to be set) |
| CreateAcknowledgeList | Creates an AcknowledgeList for the object. (No parameters to be set) |
| CreateLanguageVariants | Creates a LanguageVariant for the object. (No parameters to be set) |
| ApproveByRelation | Performs approve routine according to the relations |
| PromoteByRelation | Performs promote routine according to the relations |
| NewRevisionByRelation | Creates a new revision for all objects according to the relations |
| FreezeByRelation | Freeze all objects in accordance to the relations |
| AcknowledgeListByRelation | Create acknowledge list or all objects according to the relations |
| PublishContent | Publish current content. |
| PostByRelation | Post for all objects according to the relations. |
| EventActionByRelation | Send an Event Action for all objects following relation. |
| ResetCanApprove | Reset CanApprove for the current object. (No parameters to be set) |
| ResetCanApproveByRelation | Reset CanApprove for all objects following relation. |
| EmailAllParticipants | Send an email to all participants. |
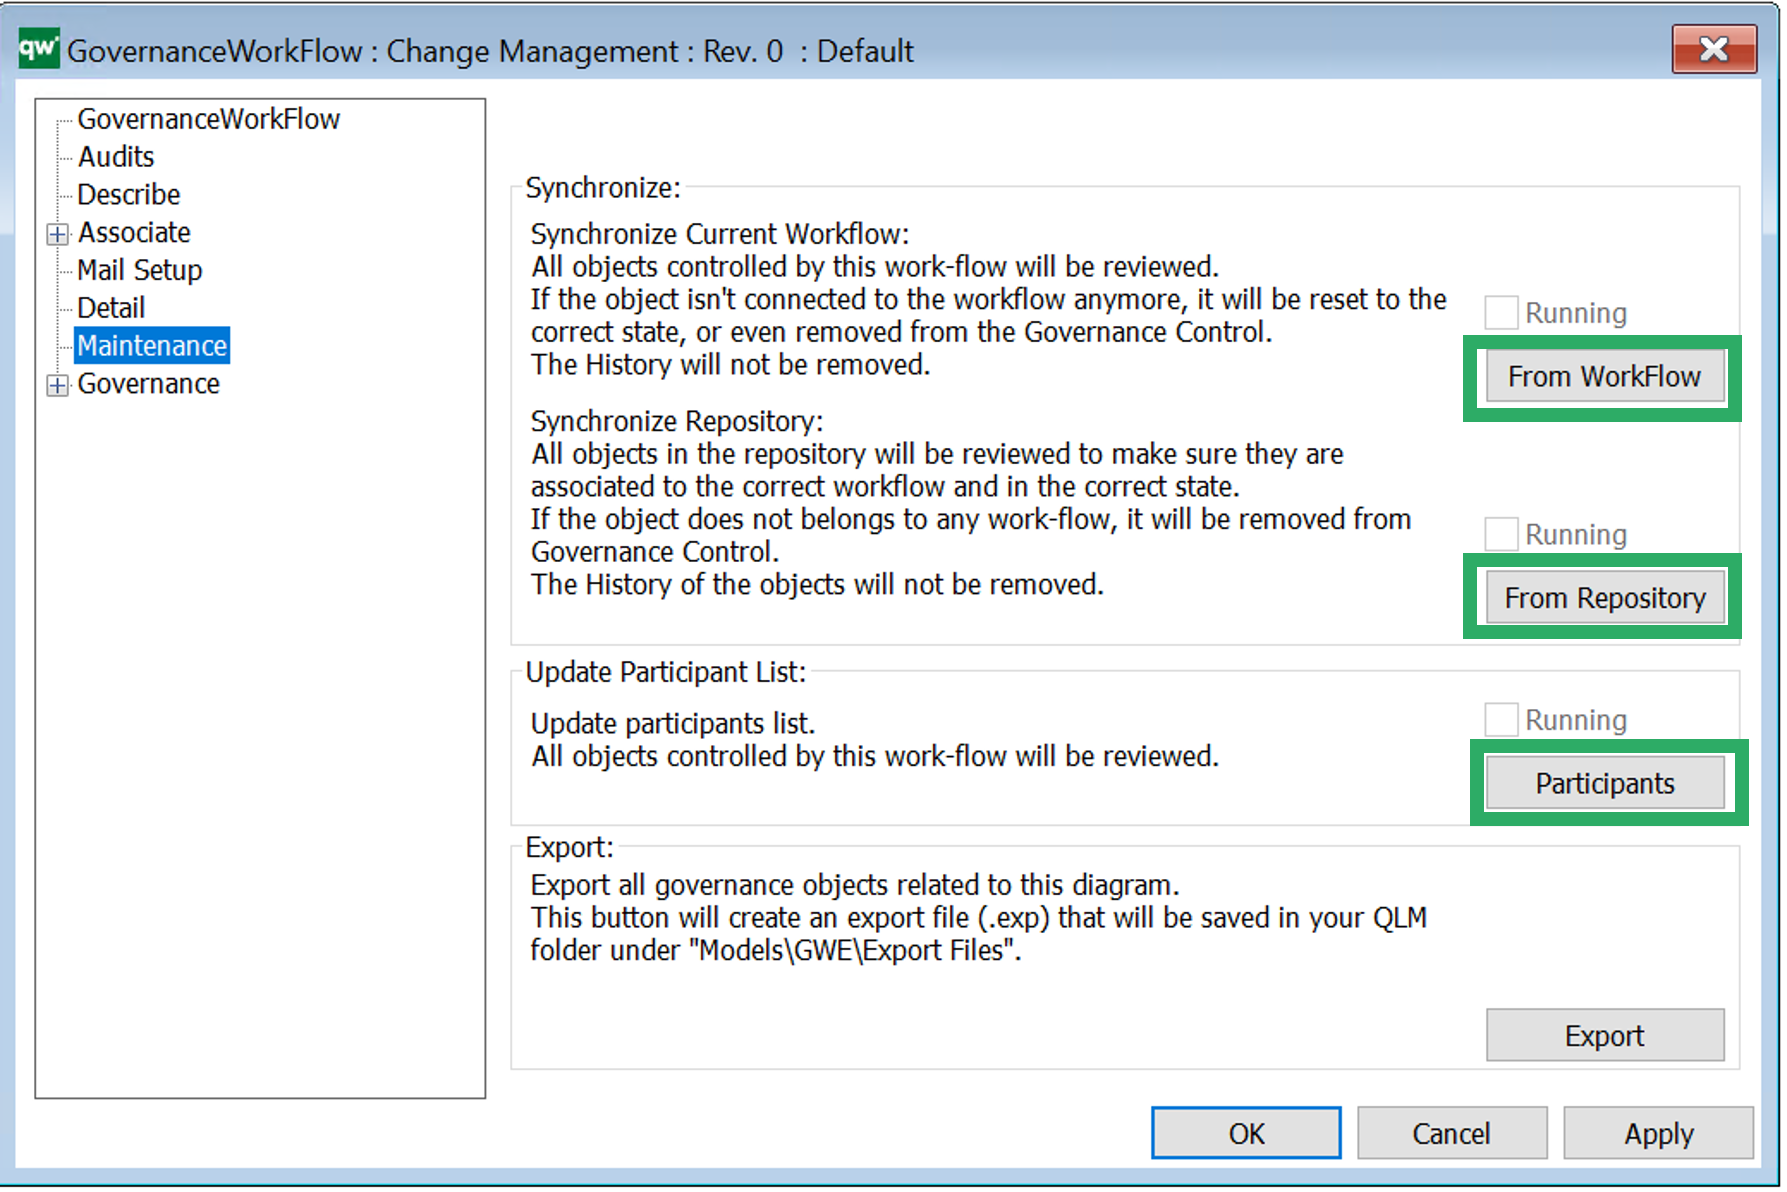
| GlobalUpdateParticipantList | Update the participants list |
| GlobalAcknowledgeListChange | Execute a global acknowledge list change |
| GlobalCheckAcknowledgementSLA | Perform a SLA check on acknowledgement |
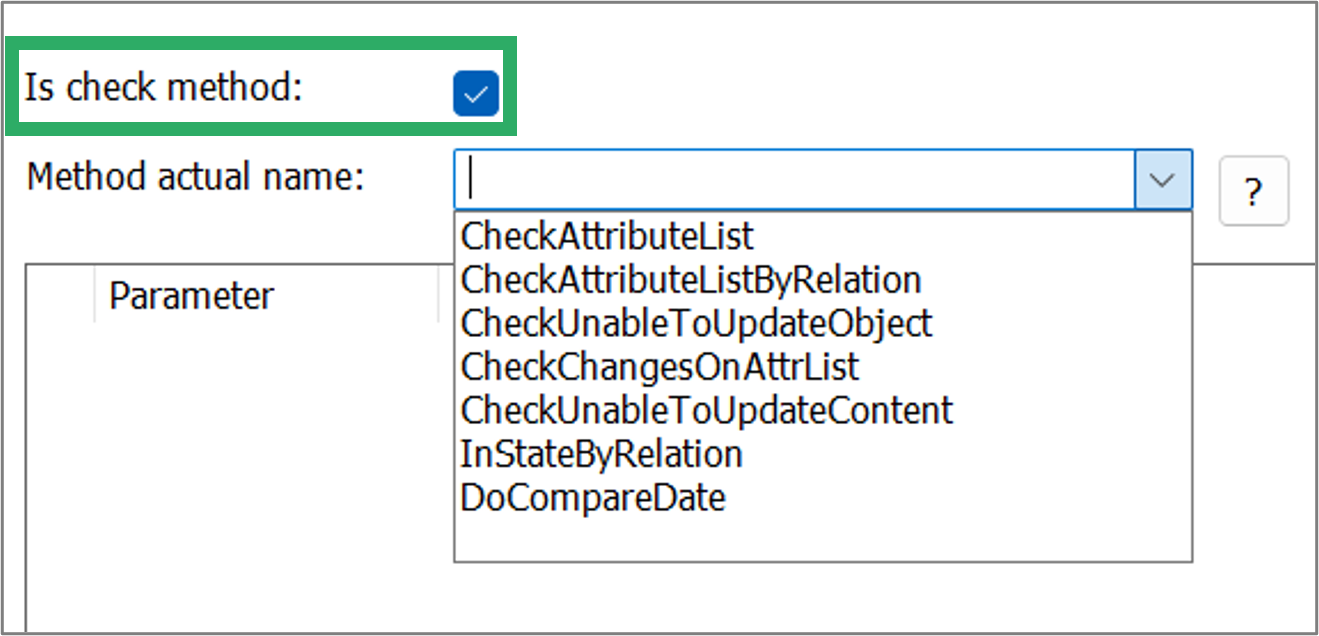
Predefined methods for when the action is a check method
When the check box ‘Is check method’ is enabled the predefined methods for a check are shown. See in the image below.
| Method | Description |
| CheckAttributeList | Performs a list of check in some attributes for the object. |
| CheckAttributeListByRelation | Performs a list of check in some attributes for all object following a relation for a specific template |
| CheckUnableToUpdateObject | Will give a message to the user, when the object cannot be updated (No parameters to be set) |
| CheckChangesOnAttrList | Returns error message if attribute is not changed with a change event. |
| CheckUnableToUpdateContent | Will give a message to the user, when some of the content on a diagram cannot be updated (No parameters to be set) |
| IsStateByRelation | Checks if object is in a target state and returns error if not. (TemplateFilter can be removed if not required.) |
| DoCompareDate | Returns an error message if the dates do not respect the condition. |
Add attributes to be checked
Some of the Method have parameters that can be specified.
Right click in the window to “Add Parameters…”
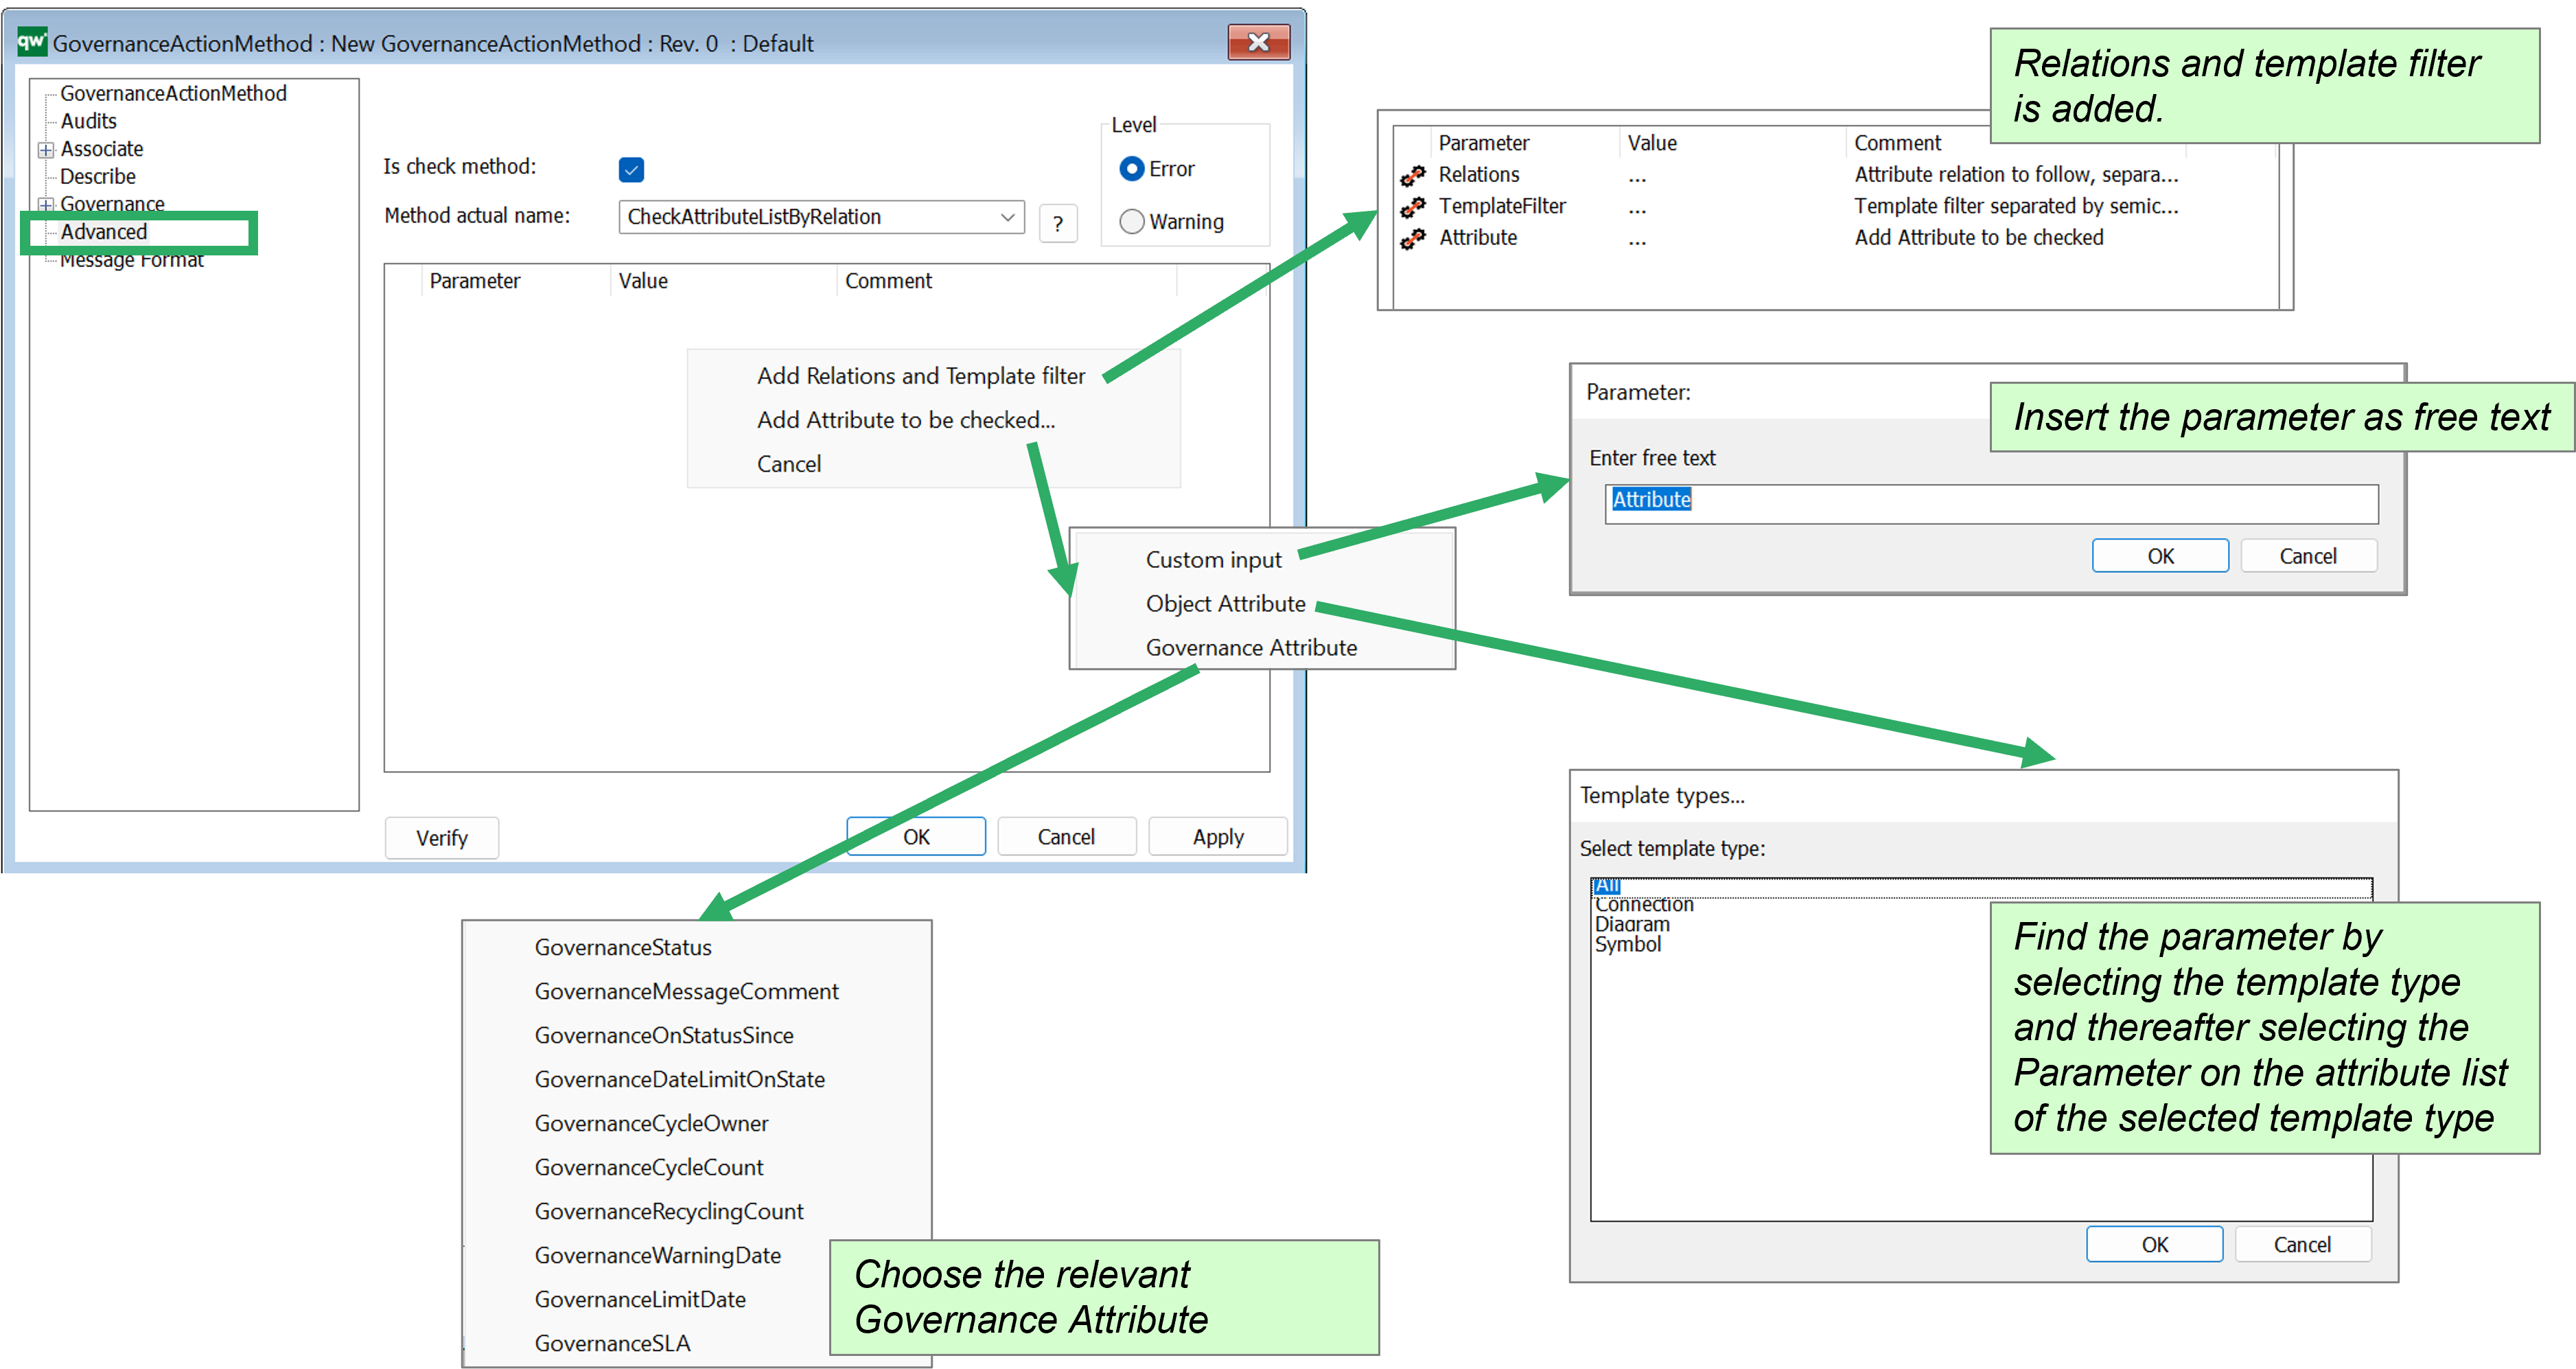
Once a parameter is added, you can click on the three dots in the Value column to choose from the menu.
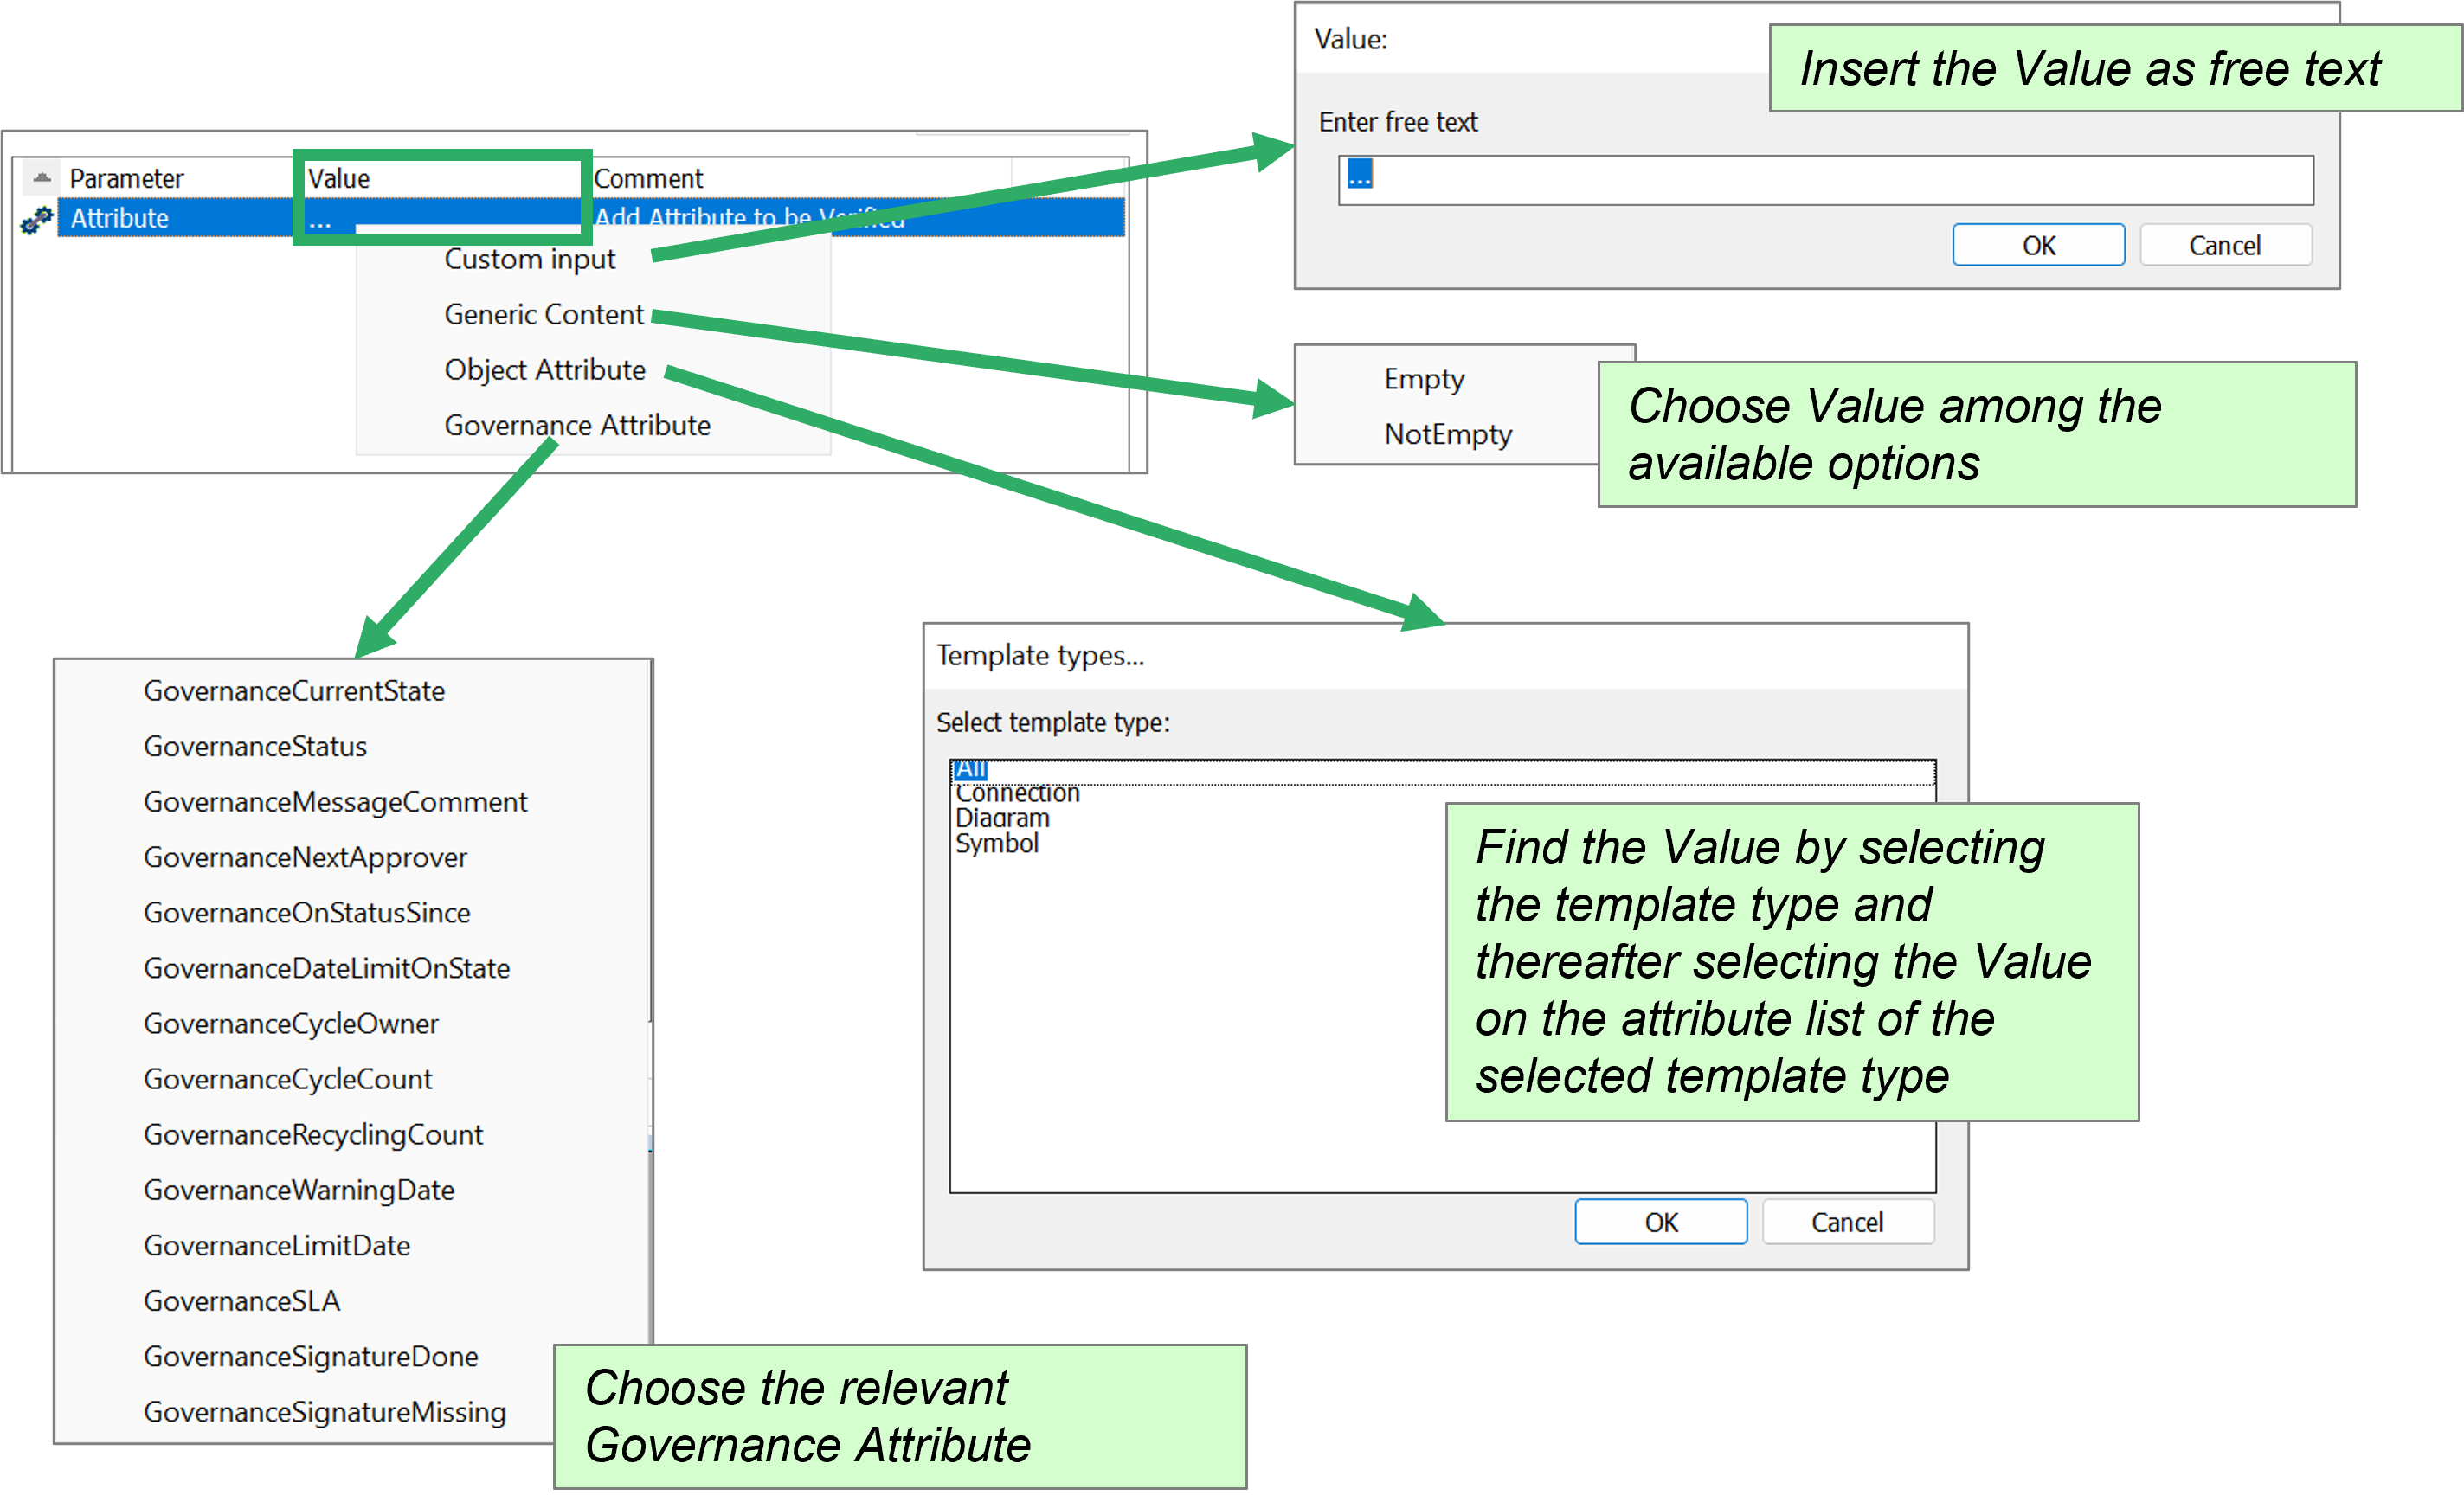
The value can be a custom input or one of the predefined. Generic Content gives the choice of checking if the attribute is empty or not empty. Object Attribute gives you a list of attributes on the chosen object. Governance Attributes are governance specific values. explained in the table below.
Note the list of available Governance Attributes depends on the method.
| GovernanceAttribute | Description |
| GovernanceCurrentState | Check the current State-object that the object is in (returns the State object) |
| GovernanceStatus | Check the current status of the object (returns a string with the status) |
| GovernanceMessageComment | The message written when a user does the transition is returned |
| GovernanceNextApprover | Check the approver of the next governance state |
| GovernanceOnStatusSince | The date for when the object got into its current state (used for calculating how long it takes to changes states for analytics and governance history) |
| GovernanceDateLimitOnState | The limit on state is calculated from the set SLA and time limit set for each state |
| GovernanceCycleOwner | Checks the cycle owner of the object |
| GovernanceCycleCount | The cycle count of the governance flow |
| GovernanceRecyclingCount | The workflow can be setup to count the number of rewinds is being done (requires a configuration of the standard workflows) |
| GovernanceWarningDate | Checks the warning date |
| GovernanceLimitDate | Checks the limit date |
| GovernanceSLA | Checks the SLA value |
| GovernanceSignatureDone | Checks the number of signatures |
| GovernanceSignatureMissing | Checks the missing signatures |
| GovernanceSignal | Check the governance signal |